Monday, June 12, 2006

Amrutham - food of the Gods

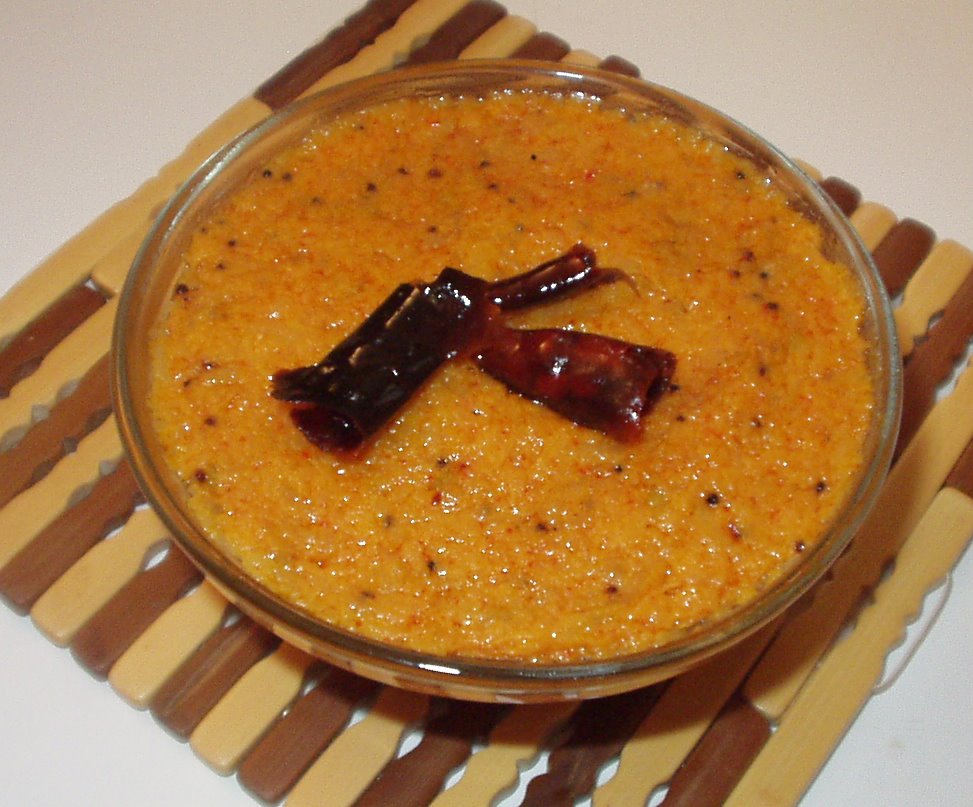
Amrutham (a dessert of carrots,almonds cooked in milk)
Bowl in pic was robbed from A's kitchen

Well, it really does taste like food of the Gods. Ambrosia would be the closest translation to the Sanskrit word Amrutham. One of our friends Mohan had brought this dessert to a potluck party on Tamil New Year day back in April. I really liked the dessert so I asked him for a recipe. He sent the recipe to me the very next day but I somehow never got around to making it. Finally, this last weekend, I made it at another of our friend A's home. It is definitely much more fun cooking in A's big, spacious and airy kitchen. It makes cooking all the more fun.

I am just doing a copy paste of the recipe that Mohan had sent me. Yes, folks he really did send me the detailed instructions :) that you see. Thank you Mohan for the recipe and thank you A for giving me a chance to actually make it :).

Software
---------------
  • 4-6 carrots
  • 2-3 tbsp ghee/Clarified butter
  • ½ gallon milk - whole or 2%
  • 1 cup almonds peeled, unpeeled, or sliced, powdered
  • 15 kernels cashews, split into 1/4 inch pieces
  • 1/2 cup raisins
  • 1 can sweetened condensed milk
  • 1/2 cup sugar (optional)
  • 6 cardamom pods, powdered
  • 6 cloves, powdered
Hardware
---------------
  • One grater
  • One sauce pan
Method
---------------
  • Wash and peel 4-6 medium sized carrots, and grate them finely.
  • In a big pan, saute the grated carrots with 2-3 table sppons of ghee.
  • Once the carrots are partly cooked, pour 3-4 cups of milk, let ot boil, and stir occasionally until carrots are very softly cooked.
  • Carefully mix powdered almonds adding required amount of milk; break any lumps, and make a smooth paste.
  • In instalments, add the almond paste to the cooked carrots; stir continuously to avoid lumping.
  • Add condensed milk, stir to make a homogeneous mixture.
  • Add the sugar, stir to dissolve; allow to boil for a while.
  • The required consistency is like a payasam/paramanam. Add more milk, or boil to thicken as needed.
  • Taste the Amrutham, add more sugar, if needed.
  • If the consistency and sweetness are OK, remove the pan from heat.
  • Add powdered elaichi and cloves.
  • Heat a smaller pan with 1 table spoon of ghee; stir & fry cashews until light brown; add to Amrutham.
  • Reheat the smaller pan with 1 table spoon of ghee; stir & fry raisins until 75% of raisins bulge; add to Amrutham.
  • Mix the Amrutham well, serve either hot or cold or however.
Since this has carrots in it, a great antioxidant rich veggie, I am sending this over to lovely Cate of Sweetnicks for her weekly ARF/5-a-day roundup.

Thursday, June 08, 2006

Carrot Cake with Cream Cheese Frosting

Two of my friends celebrated their birthdays last week and I baked them cakes.

First up is a carrot cake with cream cheese frosting. I found the recipe from the joy of baking website, here. I pretty much used the recipe as is except for the eggs. Instead of 4 eggs, I only used 2. I also doubled the frosting recipe since I was going to frost the sides and decorate the cake as well.

Here are some pictures from the project.

carrot cake layers all ready to be frosted with wax paper put cut into small pieces put under the cake to catch the frosting

first layer of frosting applied (the crumb layer), the cake went into the fridge for an hour before the second layer of frosting

after the second layer of frosting is applied, the cake is being decorated. I put the colored frosting in a ziplock bag and poked a hole at the end to use it as a piping bag

another picture of the cake being decorated

carrot cake all decorated and ready for the birthday girl

I will post the second cake pictures next week. This is my entry to Tony's weekend curry mela.

Have a great weekend everyone!

Tuesday, June 06, 2006

Whole Wheat Penne with Creamy Basil & Veggie Sauce

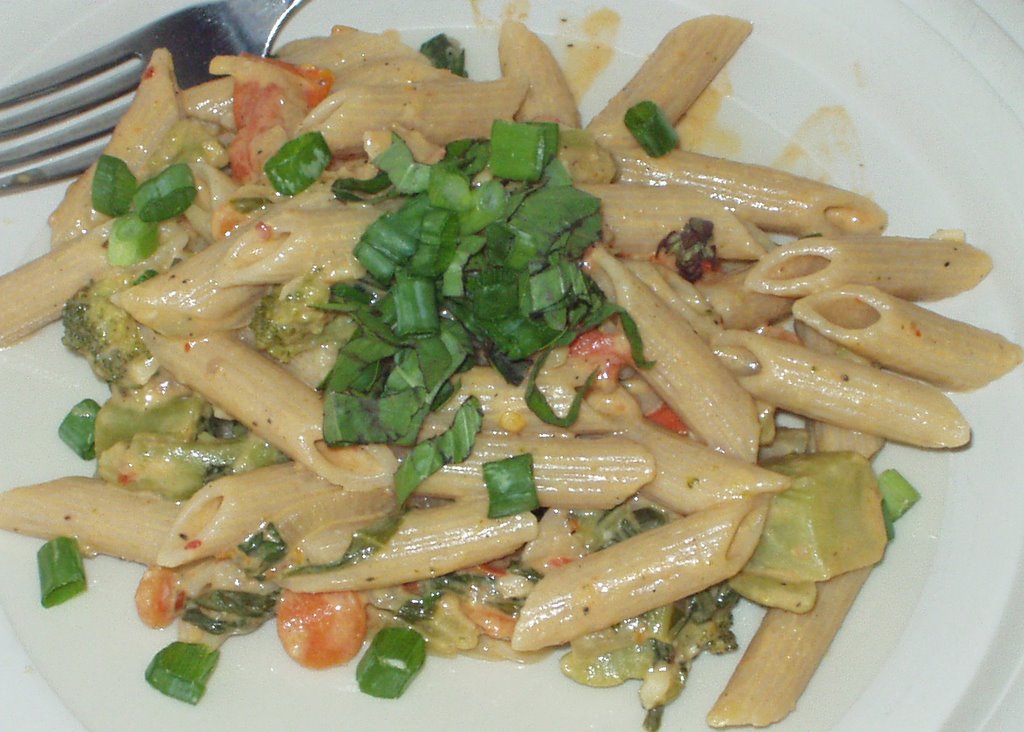
whole-wheat penne in creamy veggie sauce

What do you do when you have a whole lot of fresh veggies left over and some fresh basil? You make some good pasta :) and send it over to Cate for her weekly ARF/5-a-day round up!

All the veggies mentioned in the recipe can be used as is, some new ones can be thrown in or some of them can be substituted with others - like spinach can be substituted in place of the mustard greens etc.

Software
---------------
  • 10 oz whole-wheat penne pasta
  • 1 sm. onion, sliced
  • 2-3 cloves garlic, minced
  • 2 cups frozen brocolli
  • 2 cups of fresh mustard greens/spinach, chopped
  • 9-10 baby carrots, cut in circles
  • 1 small zucchini, cubed
  • 15-20 cherry/grape tomatoes, halved
  • 2 green onions sliced in circles
  • 1 tbsp red pepper flakes (optional)
  • 2 tsp freshly ground black pepper
  • salt, to taste
  • milk, about 2 cups
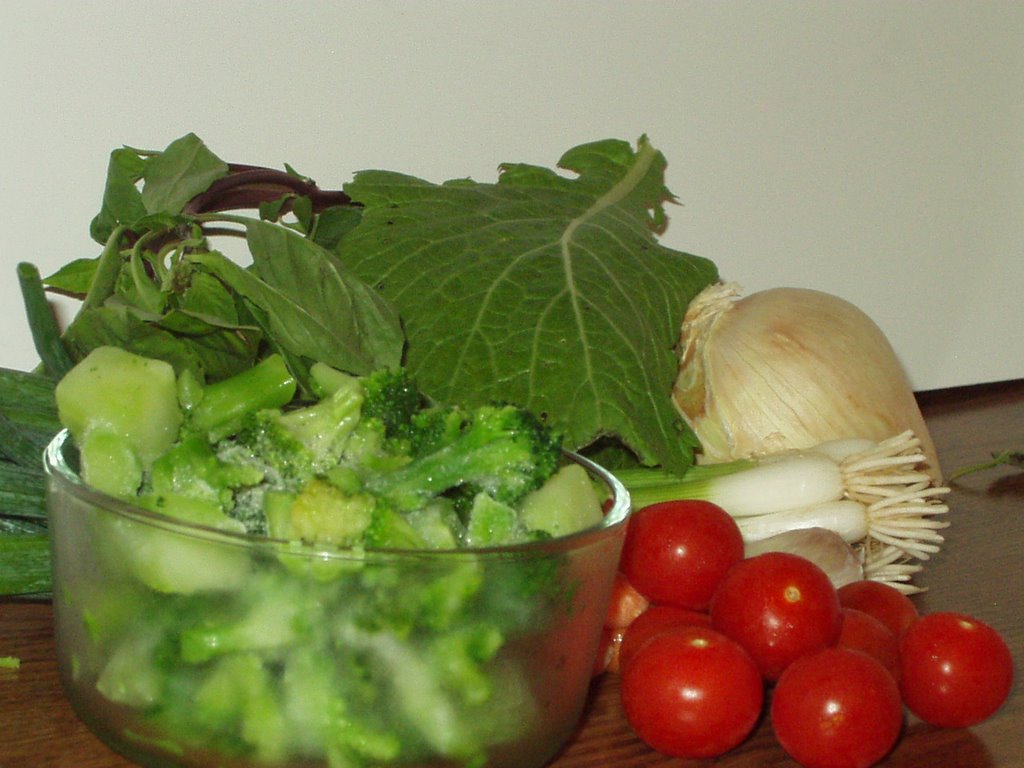
  • 1/2 cup basil leaves, chopped ingredients for the pasta sauce
  • 1/2 cup of freshly grated parmesan cheese
  • 2 tbsp extra virgin olive oil
Hardware
---------------
  • One large saucepan for the pasta
  • One medium-small saucepan for the sauce
Method
---------------
  • Put a large saucepan of water on heat. Cook the pasta according to the package directions. While the pasta is cooking make the sauce as below.
  • Put the smaller sauce pan on medium high heat. Add the oil.
  • After the oil heats up, add the onion and garlic. Saute until onion is translucent.
  • Add the carrots, zucchini and brocolli. Cook for a couple of minutes.
  • Add the mustard greens, tomatoes and two thirds of the green onion. Add the black pepper, red pepper flakes (if using), salt and cook for about 2-4 minutes until the greens wilt and the tomatoes and soft to touch.
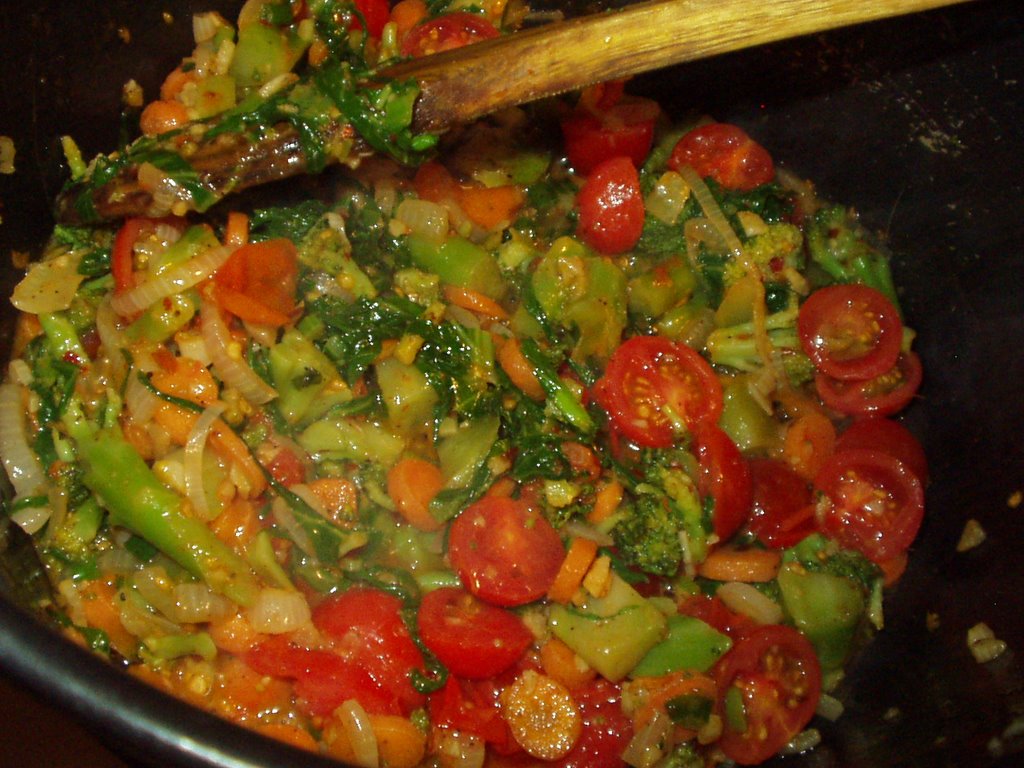
pasta sauce before adding the milk
  • Add the milk (about 2 cups) so all the veggies are well covered. Cook until the milk comes to a boil. Turn off the heat. Add the parmesan cheese and two thirds of the chopped basil.
pasta sauce already to roll

Mix in the sauce with the pasta, add in the rest of the basil and the green onions. Serve.

Kitchen Notes: The reddish tinge in the pasta totally came from the small cherry tomatoes.
You may need to add more milk depending on the amount of veggies you add.

Sunday, June 04, 2006

Cool Refreshing Summer Drink - Strawberry Limeade

Straight to the "recipe" (not) :)

  • 6 oz or 1/2 can frozen limeade mix (like Minute Maid)
  • 1 1/2 cup chopped strawberries
  • About 3-4 cups water (enough to make 40 oz mark on the blender)

Put everything in the blender, blend well, enjoy with a sliced strawberry!

Thursday, June 01, 2006

Jihva for Ingredients - Cool and Refreshing Strawberry, Spinach and Mandarin Orange Salad

I am back and first off I want to thank you all for your support and wishes for VKN's Cooking Competetion. There are not enough words to express my gratitude for all the love and affection you all have shown! It made me feel so special!

Back to blogging - coming up later tonight on your favorite browsers is my Jihva for Ingredients submission - cool and refreshing strawberry and spinach salad! Stay tuned!


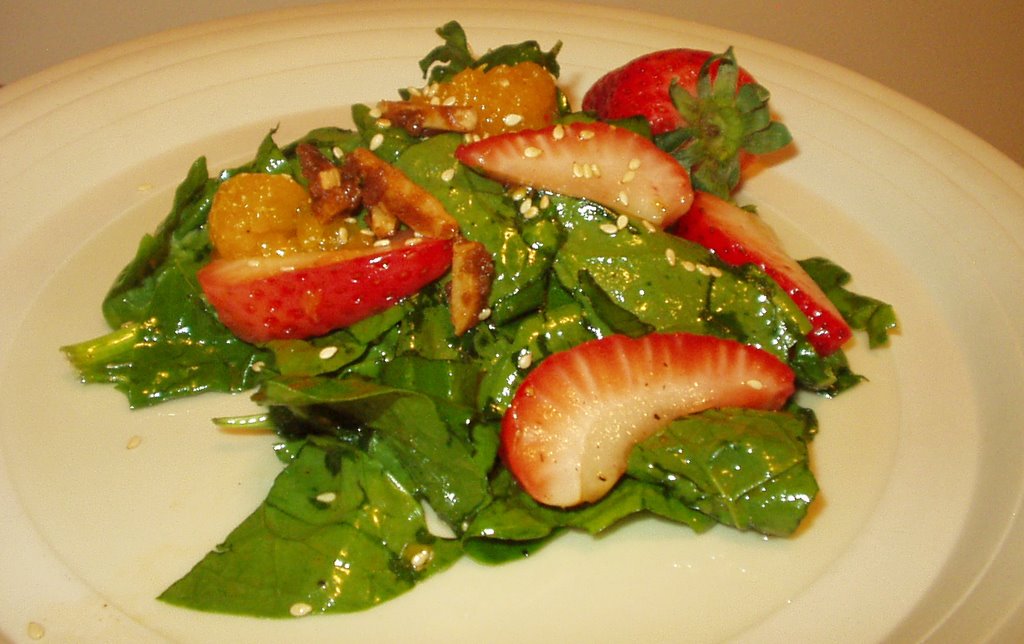
Here's presenting the strawberry, spinach & mandarin orange salad! (Yes, I added the mandarin oranges as a last minute thing. They are totally optional)

strawberry spinach and mandarin orange salad

With my break, I had totally forgotten about the Jihva for ingredients that Baking Fairy is hosting this month. We got invited to go to a lakeside bbq tonight and were asked to bring a covered dish. I decided to make a strawberry and spinach salad as I thought that would be a cool and refreshing treat to everyone. I got home last night with strawberries and spinach, prepped the strawberries (cleaned, hulled, sliced) and spinach (cleaned, dried, chopped) and that is when I remembered the Jihva event. I am just amazed at how little things like this can make me so happy!

Coming to strawberries - unlike last the month's ingredient (the Mango), I do not have any childhood memories associated with strawberries. When I was in India, this fruit (atleast in my region) was not so common. I ate it occasionally with icecream in icecream parlours/shops. When I came to the US, strawberries quickly became one of my favorite fruits in the U.S. People who know me know that whenever I am asked to buy icecream, I always buy either a strawberry or a chocolate icecream. I just love the sweet, succulent strawberries. Though I never eat fast food (McDonalds, Wendys etc) I do indulge in Sonic's strawberry shake once in a while. It is the best :) in my opinion.

This recipe is adapted from many different strawberry and spinach salad recipes out there in the internet world. I modified the recipes along the way to my own taste. It is very simple to make and 90% of the work can be done ahead of time. I am going to be deviating from my usual software, hardware and method style as this is very simple recipe and I don't want to make it look too complicated by adding all that jargon :)!

Put the following together in a large bowl and refrigerate until chilled:
  • 2 bunches fresh spinach, cleaned, dried and coarsely chopped into bite sized peices
  • 4 cups strawberries, cleaned, hulled and sliced
  • one 15 oz can drained mandarin oranges, juice reserved (optional)
Mix the following together until the sugar dissolves in a medium sized bowl and refrigerate until chilled:
  • 1/4 cup white wine vinegar
  • 1/2 cup extra-virgin olive oil
  • 1 tbsp sesame seed oil
  • 1/2 cup reserved mandarin orange juice
  • 1/2 cup white sugar
  • 2 tsp paprika
  • 1/2 tsp freshly ground black pepper
  • 1/4 tsp worcestershire sauce
  • 1/4 tsp onion powder
  • 1/4 tsp garlic powder
  • 1 pinch chilie powder/cayenne pepper
  • 1 pinch salt
  • 2 tbsp toasted sesame seeds
For the candied almonds (optional)


click on pics for enlarged images
  • 1/2 tbsp butter
  • 2-3 tbsp brown sugar, packed
  • 1 large pinch ground cinnamon
  • 1 cup silvered almonds
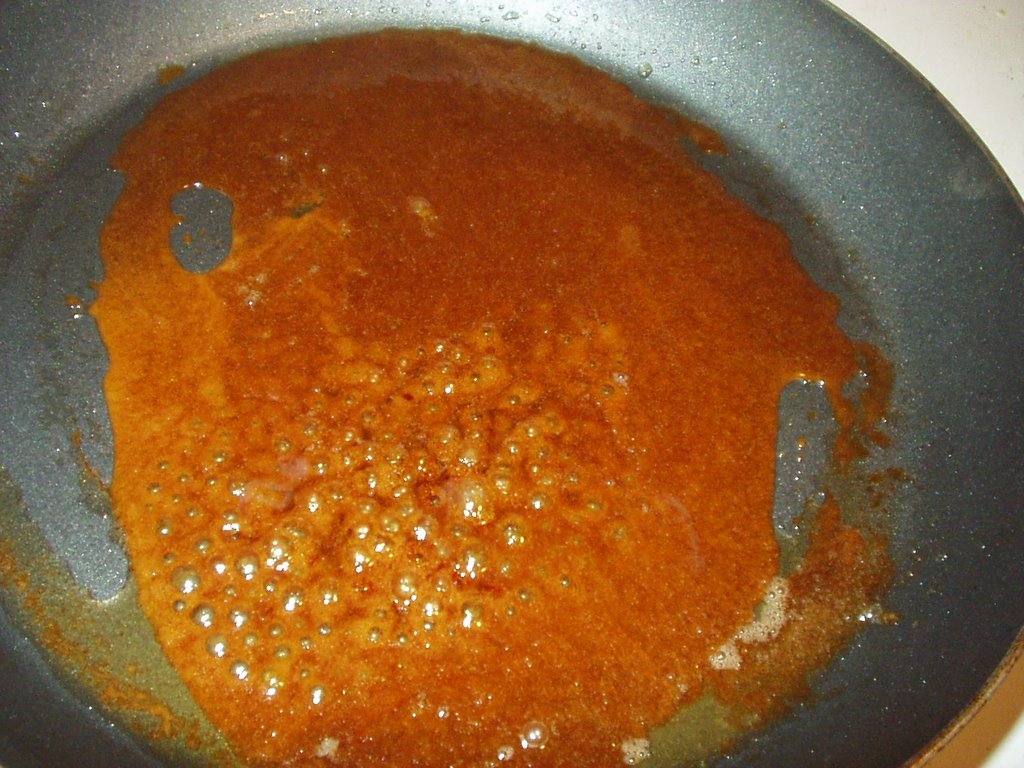
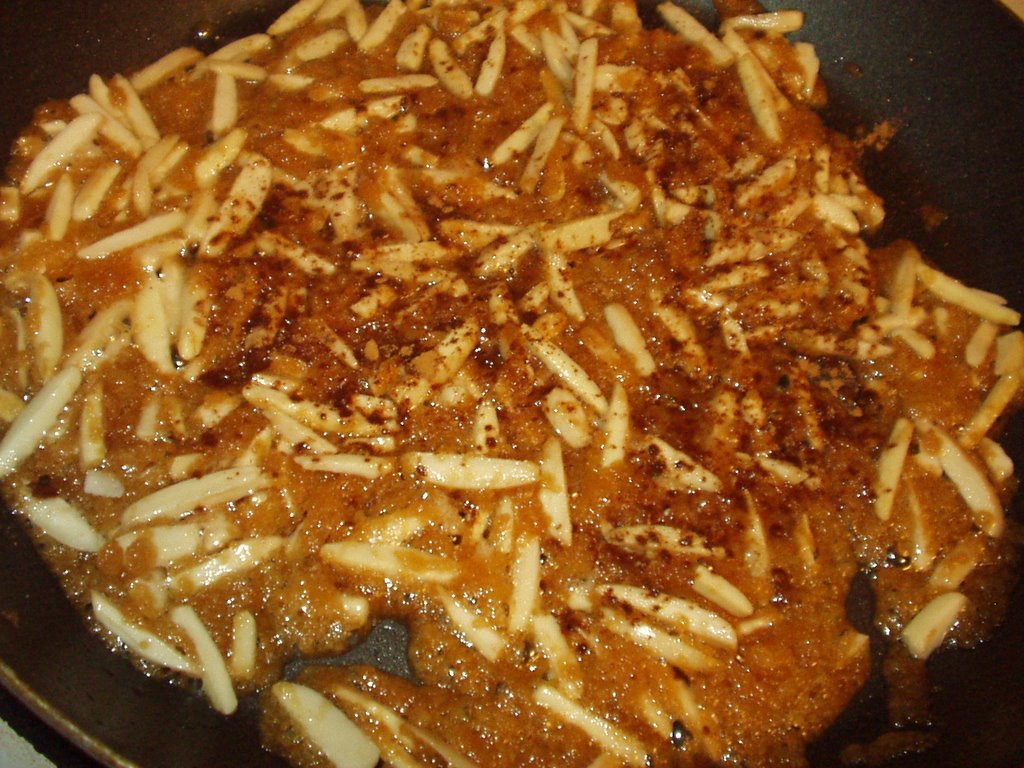
Melt the butter and brown sugar on medium heat on a pan(takes about 4-5 min) and add the almonds and the cinnamon. Stir the almonds constantly so as to avoid them sticking to each other as much as possible for about 5-6 minutes until golden brown! Transfer to a wax paper, seperate the almonds as much as possible and let cool.

Pulling everything together

Mix the dressing thoroughly with the first set of ingredients (spinach, strawberries and oranges). Add candied almonds as a topping. Enjoy!

Thank you Baking Fairy for hosting this wonderful Jihva for Strawberries event!

Wednesday, May 17, 2006

Short Blogging Break

The Great Sand Dunes and the Colorado Mountains

I am going to be on a short blogging break. I meant to post this yesterday but couldn't get a chance to. I hope to be back sometime next week. I am leaving you all with a picture of the Great Sand Dunes in Colorado, taken last Summer on our trip there.

Monday, May 15, 2006

Spice is Right - Ginger Shortbread Cookie bars

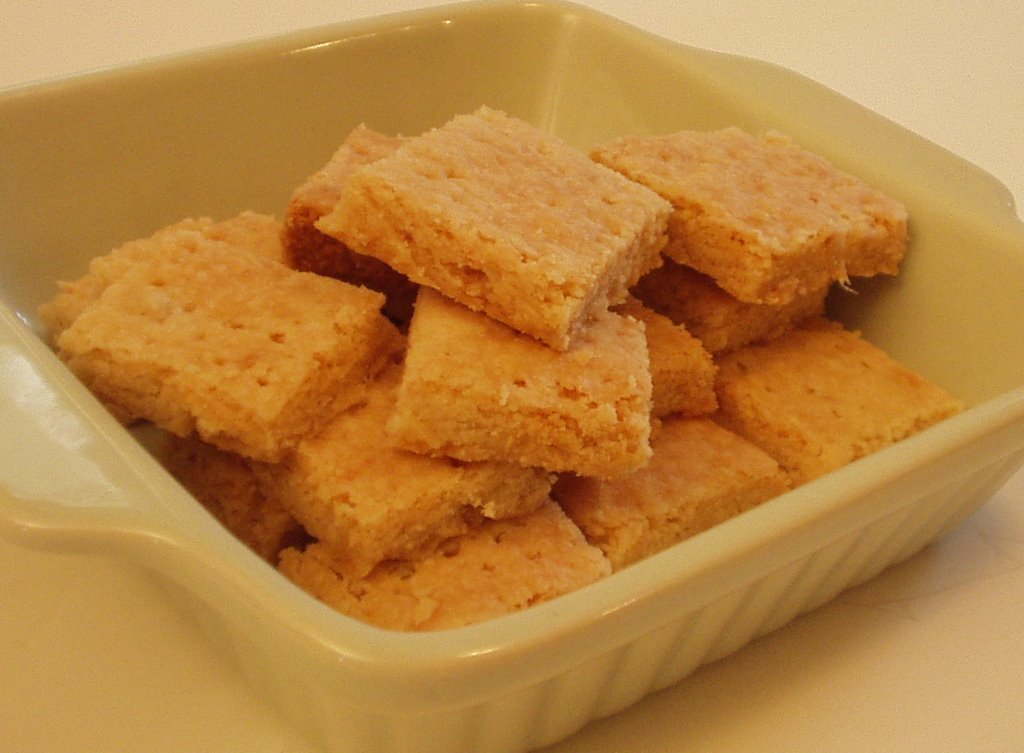
gingered shortbread cookie bars

Barbara of Tigers and Strawberries has a revolving monthly event called Spice is Right! Read about this month's theme on Barbara's blog. I did not have the time to submit one for last month and I told myself that I was going to make something for this month. I said this to myself so many times that I totally forgot about it, well, until late Sunday night! So, it had to be a quick and easy recipe. The first spice that came to my mind was chile powder. I had seen Emerill use chile powder on one of his shows to create a dessert and that stuck in my head. I started googling for chile infused desserts and came across some chocolate cakes, chocolate cupcakes that were chile infused. Some how that seemed a little more work. I then starting flipping through my cookbooks. I was looking at my "Best-loved Cookies" book and I stumbled on shortbread cookies. I hadn't made them in a while and as soon as I saw the cookies, I started thinking about spice options. I first thought chile powder but thought faded away from the mind pretty soon as it did not really sound very appealing. So I went with ginger instead.

I do not even remember when my first association with ginger began. Probably when my mom used to recruit me to help her clean all the dirt off the ginger after she brought it home. Yes people, don't be surprised now, ginger used (still probably does) to come with dirt back in India. It was red, clay consistency mud ("erra matti" literally meaning red dirt) that the ginger had all over when it was first bought. I am not sure if the ginger actually grew in that type of dirt or if store owners just kept it in that dirt to "preserve" it. Any enlightenment on this topic will be appreciated. The "ginger cleaning" ritual became even more rigorous in the Summers. That is because that is when my grandmother and mother did their pickling (mango mainly) and we needed ginger in large quantities for that. There used be kilos and kilos of ginger that all of us kids (cousins, siblings) helped clean and scrape. I just loved the way ginger smelled, so I didn't mind that chore at all.

It seemed to me like my family put ginger in (what seemed like) almost everything savory. They put it in tea, curries, mainly non-vegetarian dishes (lamb, chicken, fish etc), fried vegetables, savory items (murukku etc). If you pay attention to my recipes, you will see that I carry the "ginger gene" in me too. I tend to put ginger in almost everything. The major culture shock to me with ginger was when I first took a bite of the ginger snap cookies almost 4 years ago. That was the first time I realized that ginger is used in sweet dishes too. Now, it doesn't really seem very wierd to me to put ginger in sweet stuff but if you had talked to me half a decade ago, I probably would have gagged at the idea ;).

ginger

Even though I got the short bread idea from the cookbook, I did not follow that recipe. I used a recipe from a friend from my previous work place. It is a very simple, "wake-me-up-in-the-middle-of-the-night-and-I-will-rattle-it-off" kind of recipe. Here's the recipe!

Software
---------------
  • 1 cup flour
  • 1 heaping teaspoon corn starch
  • 1/4 cup sugar
  • 6 tbsp melted butter
  • 1 tbsp ground fresh ginger
  • 1 tbsp finely chopped fresh ginger
Hardware
---------------
  • One 9 inch cake pan
  • One small mixing bowl
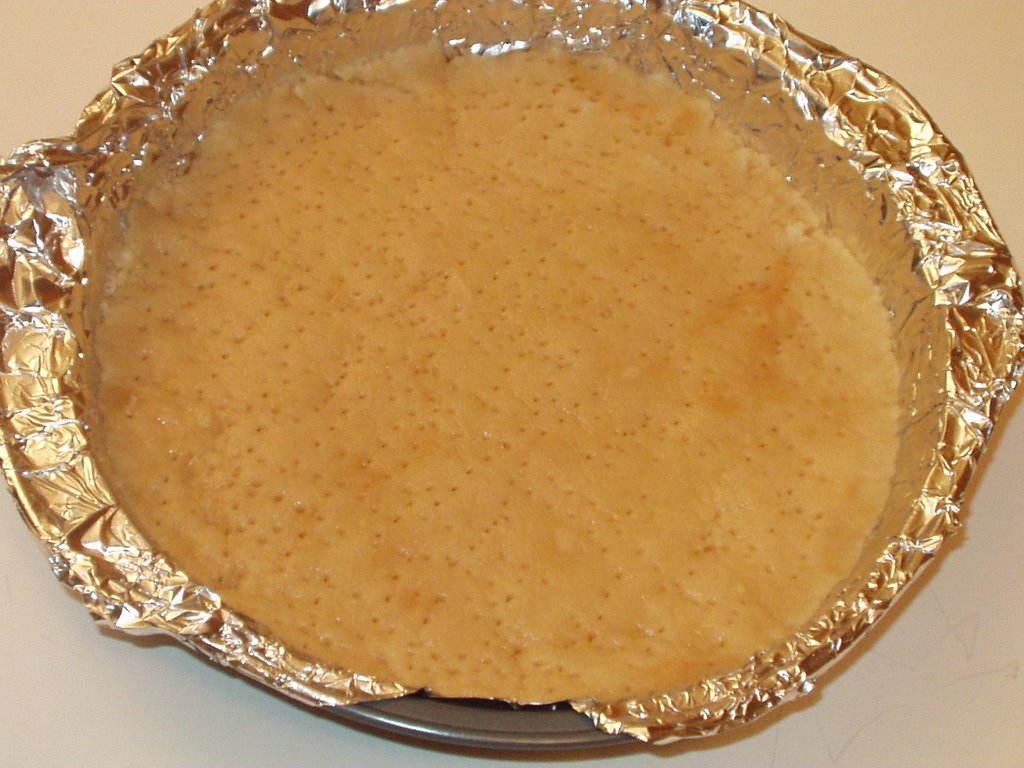
the short-bread ready to go in the oven
Method
---------------
  • Pre-heat the oven to 325 degrees.
  • Cover the cake pan with aluminium foil for easy clean up. This step is of course optional.
  • Mix all the ingredients under the software list and press the dough into the cake pan until it is evenly pressed.
  • Poke holes all over the top with a fork.
  • Bake in the oven for about 15 minutes. Pull it out of the oven and using a knife, score the cookie and cut into desired shapes.
  • Put it back in the oven for another 15-20 minutes or until the cookie is lightly browned.
  • Let it cool in the pan and break of the already scored cookie pieces.
Some Kitchen Notes:
  • The first four ingredients in the list are the original shortbread recipe. I just added the ginger to it. This cookie was unbelievably delicious. When I bit into a piece that had the actual ginger in it, it was heavenly.
  • I add a teaspoon of vanilla to the regular shortbread cookies if I am making them without the ginger.

Saturday, May 13, 2006

Easy, Breezy Saturday Brunch

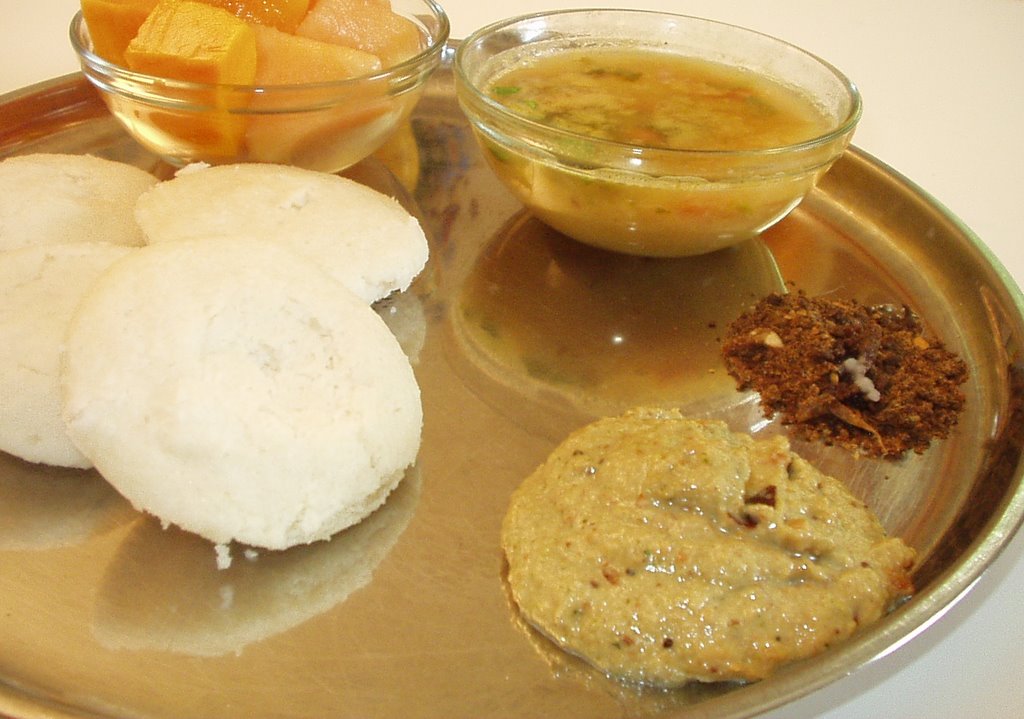
counter-clock wise direction: idli, peanut chutney, vellulli karam (garlic & spice powder) with ghee, mullangi (radish) pappu charu and fruit (mango & cantaloupe)

It was easy because it only took me a few minutes to throw this together. Breezy coz it is very windy outside today, but a very beautiful day neverthless! This is what we ate for our brunch this Saturday morning. I had idli, peanut chutney and mullangi pappu chaaru/sambhar in the freezer that I thawed and re-heated. I had made this last week and freezed some of it. While the food was in the microwave, I got busy cutting up some fresh fruit - cantaloupe and mango. Brunch was ready! See that is one of the pleasures of freezing food. It works for those days that are really crazy and hectic.

Thursday, May 11, 2006

Shrimp Curry (in a spicy onion, tomato, tamarind sauce)

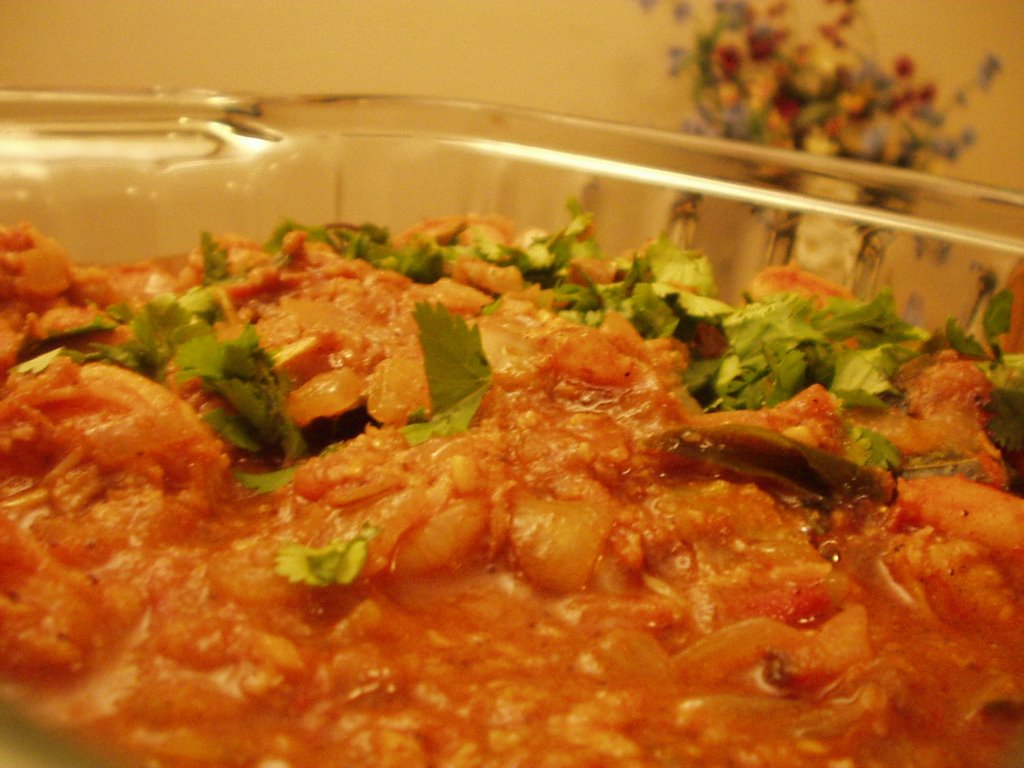
shrimp curry

This is my entry to always energetic Anthony's Curry Mela for this weekend!

It is hard to believe that this is my first non-vegetarian post on this blog. I do eat chicken, some fish and shrimp but I don't cook with them that often. That are a few reasons why that happens/has been happening lately. Whenever we go out to eat, almost 90 percent of the time I order non-vegetarian. So, when I cook at home, I feel like eating vegetables. The other thing that contributed to my sparse non-vegetarian eating habits is that, for the past 8 weeks, I was a part of a group "walking" program where we were supposed to walk and also count the fruits and veggies we eat each day. So, every time I thought of cooking something non-vegetarian, the thought that I couldn't count them came to my mind and I just refrained buying meat at the grocery store.

Growing up, my mom never cooked shrimp at home. I think she just didn't like the taste and smell of shrimp! Although, my dad was a "shrimp eater", he always had to eat it outside since he couldn't make it on his own :). For some reason, since my mom never made it at home, I wouldn't eat it anywhere else too. My mom did cook other sea food though. The fish pickle that she makes is just out of this world. YUM! For that matter all the non-vegetarian pickles she makes are really good - the mutton pickle, the chicken pickle, just thinking about them makes my mouth water! For a person who doesn't "eat" non-veg she is an amazing non-veg cook! Yeah, that is right, my mom doesn't eat non-vegetarian but she does cook it for the family and guests! We have seperate utensils at home that she cooks non-veg in :). Yeah, is pretty funny to watch her cook non-vegetarian trying to avoid touching everything else and only managing with the few utensils set out for this particular task :)).

Back to shrimp, I never ate shrimp until I came to the U.S few years ago. I don't remember the first time I ate it either. It must have been at a friends house when I was studying here. I really did not like the way it tasted, so never cooked with it. But all that changed when I went to Chilis/Carlos O Kellys (don't remember which one) couple of years ago and I ordered a dish and the waitress said that for a couple of bucks extra, I could get an order of grilled shrimp that will be placed on top of the dish. I thought I would try it and told her that I would like a side of it not mixed in with my actual meal. The shrimp that she brought was so yummy! It was grilled, sprinkled with some lemon juice and that totally changed my view on shrimp.

Now that you know my entire association with shrimp, back to this post. This shrimp curry is a spicy, yet tasty concoction. It goes really well with jeera rice or even plain basmati rice. The spices in this recipe can toned down (or up) to your liking.

First a few kitchen notes
  • I skip the marination part if I am really in a hurry. Instead of the 30 minutes I specify, I sometimes do it for about 10-15 minutes, the time it takes me to chop all the other veggies/spices up.
  • The cumin + caradamom + cloves powder can be substitued with regular garam masala but the taste will definitely be different. I usually grind this masala up and store in the refrigerator for a month or so to use in different dishes.
Software
---------------

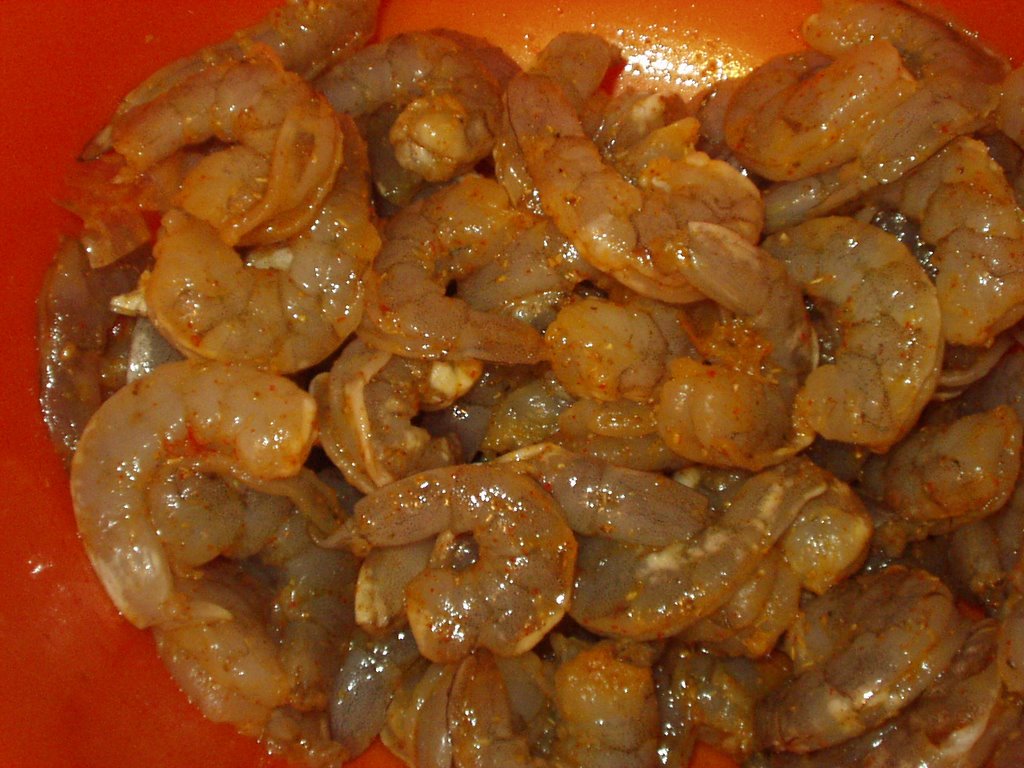
shrimp marinating

For the marination
  • 1 tsp salt
  • 1 pinch red chili powder
  • 1/2 tsp turmeric powder
  • 1 tbsp fresh lemon/lime juice
For the Curry
  • 1 pound raw, shelled and deveined large shrimp (about 50-60 shrimps)
  • 1 large onion, chopped fine
  • 2 Indian green chilis, slit length wise
  • 2 tbsp garlic chopped fine
  • 2 tbsp ginger, chopped fine
  • 1 tsp turmeric powder
  • 1 large tomato, chopped fine
  • gooseberry sized tamarind, soaked in hot water, juice extracted
  • 2 tbsp freshly grated coconut
  • 1 heaping tbsp cinnamon + caradamom + cloves powder
  • 1 tbsp coriander powder
  • 1 tbsp chili powder (I think I added more than that, so this can adjusted to your liking)
  • salt, to taste
  • 2-3 tbsp extra-virgin olive oil
Hardware
---------------
  • One sauce pan
  • small bowl for marination
Method
---------------
  • Toss the ingredients for the marination for together with the shrimp. Set aside in the refrigerator for about 30-45 minutes.
  • Put the sauce pan on medium high heat, add the oil.
  • After the oil heats up add the onions and fry for about 3 minutes.
  • Add the garlic and ginger, fry until onions are translucent.
  • Add the turmeric powder, stir.
  • Add the tomatoes and fry until they are mushy.
  • Add all the masalas, the caradamom + cloves + cinnamon powder, the coriander powder, the chili powder, salt, coconut and stir.
  • After a minute or so add the tamarind juice, another cup of water and bring to a rolling boil.
  • Add the shrimp, add more water if necessary, the gravy should be too watery. Cook the shrimp until they are done (which is very quick, about 5-6 minutes), take off the heat.
  • Add the mint and the coriander leaves.
As I said before, this curry should be spicy and full of flavor. This should not taste sour at all. The tomatoes and the tamarind impart a good flavor and taste to the dish but they should not dominate the taste. The dominant ingredients in this dish are the spices and the shrimp.

Wednesday, May 10, 2006

Jihva For Mango Recipes - Pudding and Pachadi

Over the weekend, I tried out two different recipes from the "Jihva for Mangoes" event that lovely Indira of Mahanandi hosted. I glanced through the recipes and looked for something easy to make and two different kinds of recipes caught my attention. The mango payasam or pudding versions made by Santhi and Sailu. The other recipe that looked really good was the mango thokku/pachadi recipes made by Lakshmi, Menu Today, Kitchen Mate and Santhi.

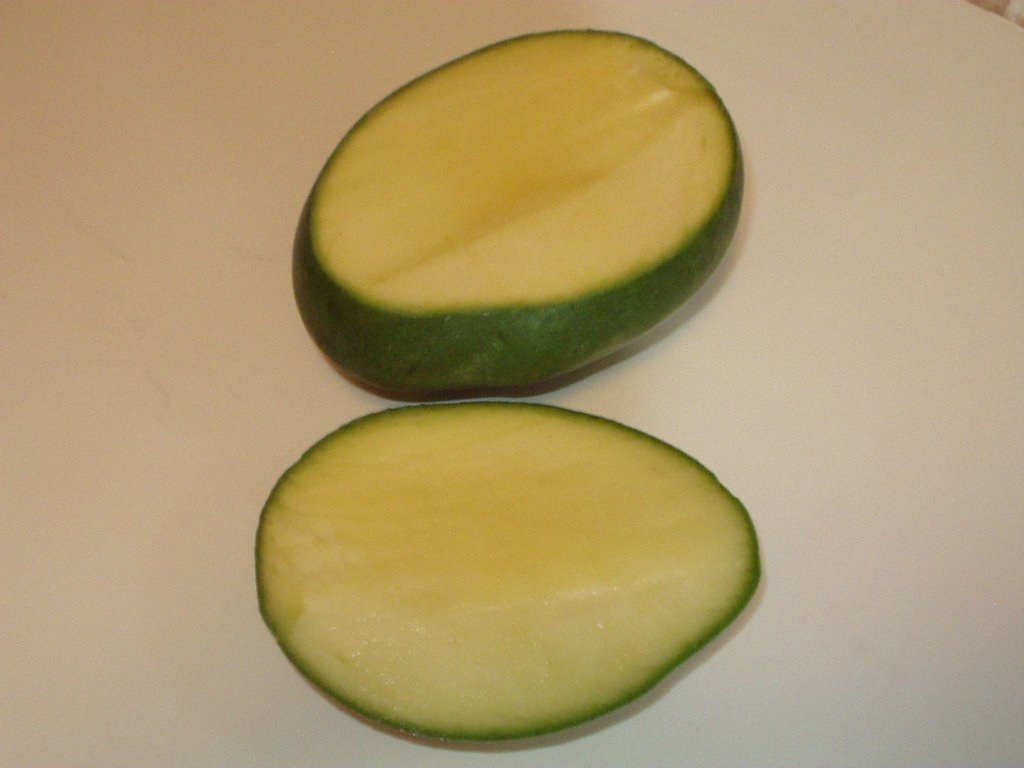
Mango Pudding / Payasam

mango payasam garnished with shallow fried golden raisins and cashews

I followed Santhi's recipe entirely for the mango pudding except that - I boiled the milk in a microwavable container until it came to a boil so I didn't have to keep stirring it on the stove top. I do this trick everytime I need to boil milk and it works perfectly. I also added about 4 tbsp of sweetened condensed milk at the very end and fried up some cashews and raisins in a tablespoon of ghee/clarfied butter and added it to the pudding at the very end.

Mango Pachadi/Thokku

mango pachadi/chutney/thokku

After looking at all the mango thokku recipes, I mostly followed Kitchen Mate's recipe, except for the methi seeds and the gingelly oil. Instead of the methi seed powder, I added the powder (chana dal, urad dal, coriander seeds, methi seeds, jeera, red chilis) I had prepared for the spinach chutney.

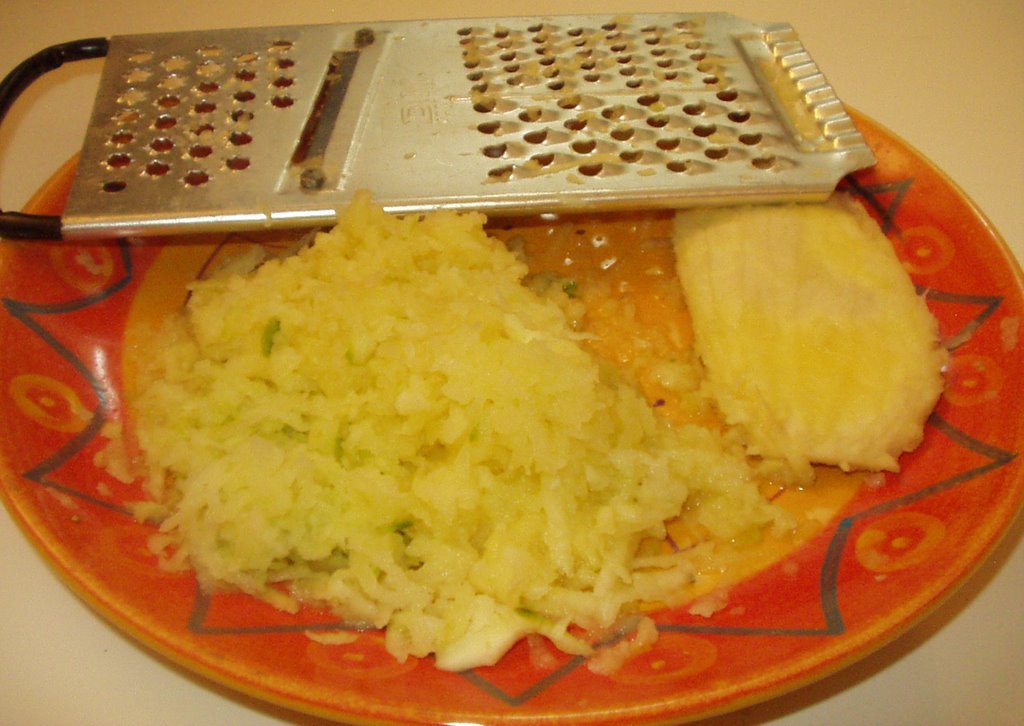
grating the raw mango

Software
---------------
  • 1 cup peeled,grated raw mango
  • 1 red chili broken into pieces
  • 1 tbsp mustard seeds
  • 1 tsp turmeric powder
  • 1 tbsp - 1 tsp chili powder
  • 3 tbsp extra virgin olive oil
  • hing, a pinch
  • 1 tbsp of the afore mentioned spice mixture
  • salt to taste
Hardware
---------------
  • one small sauce pan
Method
---------------
  • Put the sauce pan on medium heat. Add one tbsp of oil, add the mustard seeds and the red chili pieces. After the mustard seeds splutter, add the hing and the grated mango, stir for a couple of minutes.
  • Add the turmeric powder, cook for another 5-10 minutes until the raw smell goes away. Add the chili powder, spice mixture, salt and stir for another few minutes.
  • Add in the other 2 tbsp of oil and stir and turn off the heat.
Both recipes turned out really good. The pudding was really yummy with just a hint of mango in every bite. The chutney was sour, spicy and GOOD! With hot rice and ghee it tasted delicious. Thank you Santhi and Kitchen Mate for the recipes!

Tuesday, May 09, 2006

Chocolate Chip Banana Nut Muffins - ARF/5-a-day

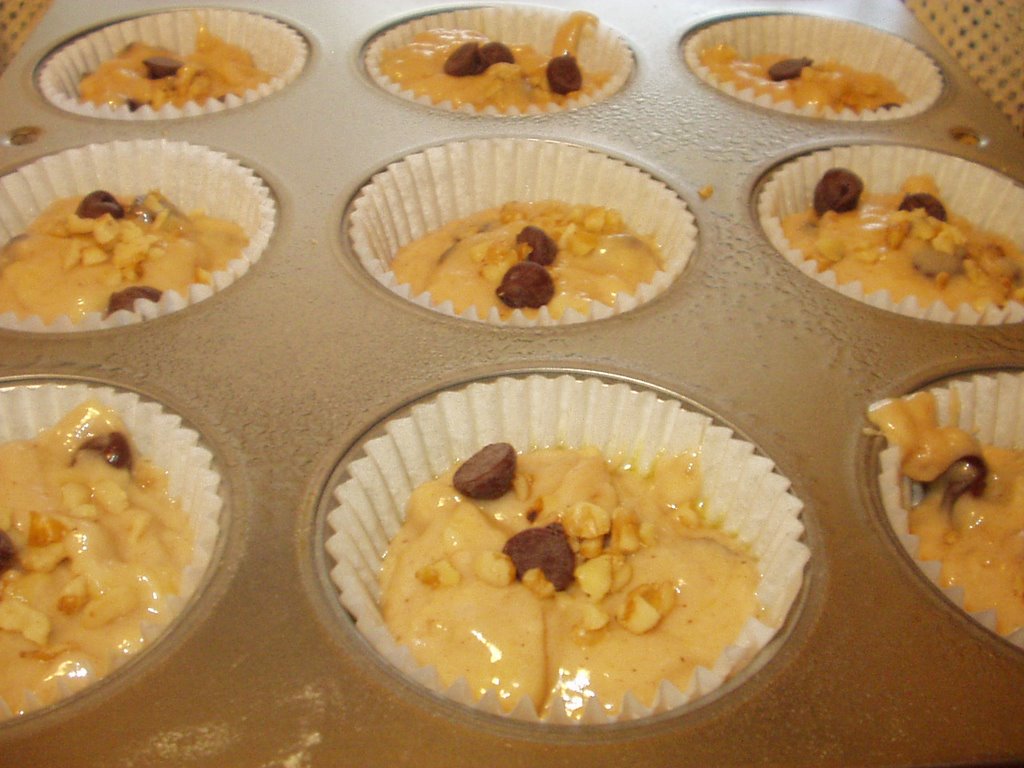
chocolate-chip banana-nut muffins, chocolate cupcake, and baby bananas

First off, I will try to explain the picture above as the picture may not be worth 1000 words in this case. I don't want any of my blog readers thinking I burnt the muffins :).

The regular light brown looking things are the chocolate-chip banana nut muffins. The dark chocolate cupcake you see above is what I made from my leftover chocolate cupcake batter from last Sunday. I had put the extra in the refrigerator, tightly covered in a container. Before I baked it, I put it in the microwave defrost cycle for a couple of minutes until it regained its consistency. I added some white chocolate chips on top of the cupcakes. On to the bananas. I think this variety of bananas are called baby-bananas. These are NOT the bananas I used in the recipe. They are the smaller version bananas and I bought from the Oriental store last week. These bananas are slender and only about 4-5 inches in length. The skin of these bananas is very thin compared to the thick flesh of the regular bananas. I also feel that these bananas taste a LOT sweeter than the regular bananas. In Telugu, my native language, these are called "chekkara keli" (chekkara meaning sugar, keli meaning banana originated from the Hindi word "kela" meaning banana).

Now on to my post, I try to participate in Cate's ARF/5-a-day that happens every Tuesday as much as I can. My previous entries to this event were Kiwi jam, Quesadillas and Guacamole, Yu Choy dal/lentils, Spinach chutney with chapathi chips, Penne with creamy veggie sauce.

This week though, Cate put a twist to the whole thing. She asked us bloggers to find ARF/5-a-day worthy recipes from other food bloggers site. As soon as I saw that, I thought to myself, "that is going to be easy" but alas as you will read below, it wasn't easy choosing what to make.

On Sunday afternoon I set the laptop on the dining table and started blog hopping. After a few minutes, I was over whelmed with a plethora of choices to choose from. A realization sunk in that I need to do something else than just blog hopping to figure this out. I made up a condition for myself to make this easier. I decided that I would have to come up with something that uses ingredients that I already had on hand.

I got up, glanced at the raw materials in the refrigerator, peeked in the cabinets to see what I had on hand. Now, once again I started blog hopping. Few more minutes later, I was even more confused on what I was going to make. Then my eyes fell on the bananas that were on the banana holder on the table on the counter. I noticed that they were I had 3 bananas that were a little on the ripe side, and one overly ripe banana (very squishy to touch) kind. I knew exactly what I was going to make - Banana nut muffins. I have made these muffins a lot of times before but have never ever used the same recipe. That was mostly because, I would forget where I got the recipe from. I then remembered that Saffron Hut had made some banana nut muffins and they looked really good. I looked up the recipe, bookmarked it and went about my day!

I did make modifications to the recipe i.e. made it a little more unhealthy (which is very unlike me :)). I usually try to add healthy ingredients, reduce the unhealthy ingredients when I am baking but today, I did the opposite. Being a chocoholic that I am, I had to add chocolate to this :). Hence they became Banana nut - chocolate chip muffins.

The modifications I made to this recipe are that I added 1/4 cup of brown sugar and 1/2 cup of regular sugar instead of the 3/4 regular sugar. Being a spiceaholic that I am, I threw in some nutmeg and cinnamom. I added some good vanilla. As I said above, I added about 1/2 cup of semi-sweet chocolate chips to the party!

Now to the exact recipe!

Software
---------------

  • 1 1/2 cups all purpose flour
  • 1 tsp baking soda
  • 1 tsp baking powder
  • 1 tsp freshly grated nutmeg
  • 1 tsp ground cinnamon
  • 1/2 tsp salt
  • 4 ripe bananas (I had 3 medium ripe and 1 overly ripe banana), mashed thoroughly
  • 1/2 cup granulated sugar
  • 1/4 cup packed brown sugar
  • 1/3 cup melted butter (unsalted)
  • 1 tbsp vanilla
  • 1/3 cup walnuts, chopped coarsely
  • 1/2 cup semi-sweet chocolate chips
  • about 30-36 chocolate chips

Hardware
---------------

  • one small mixing bowl
  • one large mixing bowl
  • one muffin tin
  • paper muffin cups (optional)

Method
---------------
  • Preheat the oven to 375 degrees.
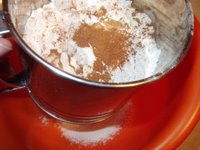
    Sift together all the dry ingredients (flour, baking soda, baking powder, salt, nutmeg and cinnamon) into the large mixing bowl.
  • Mix all the wet ingredients (melted butter, mashed bananas, granulated sugar, brown sugar, vanilla) in the small mixing bowl (and yes, the sugar is considered a "wet ingredient", atleast according to Alton Brown).
    Add the wet ingredients to the dry ingredients and mix with a fork or spoon so all the ingredients are well incorporated. (or just put on some food safe gloves and mix it up with your hands).
  • Set aside 2-3 tbsp of walnuts. Add the rest of the walnuts and the 1/2 cup of chocolate chips into the batter and mix well.
  • Put the paper muffin cups in the muffin pan, fill the cups until they are a little more than 3/4 full.
    Add about 2-3 chocolate chips and a few walnuts on top of the 3/4th filled muffin cups.
  • Bake them for about 15-20 minutes, until a toothpick inserted comes out clean and the muffins are brown on top.
Thank you Saffron Hut for the recipe and thank you Cate for hosting the event.

Friday, May 05, 2006

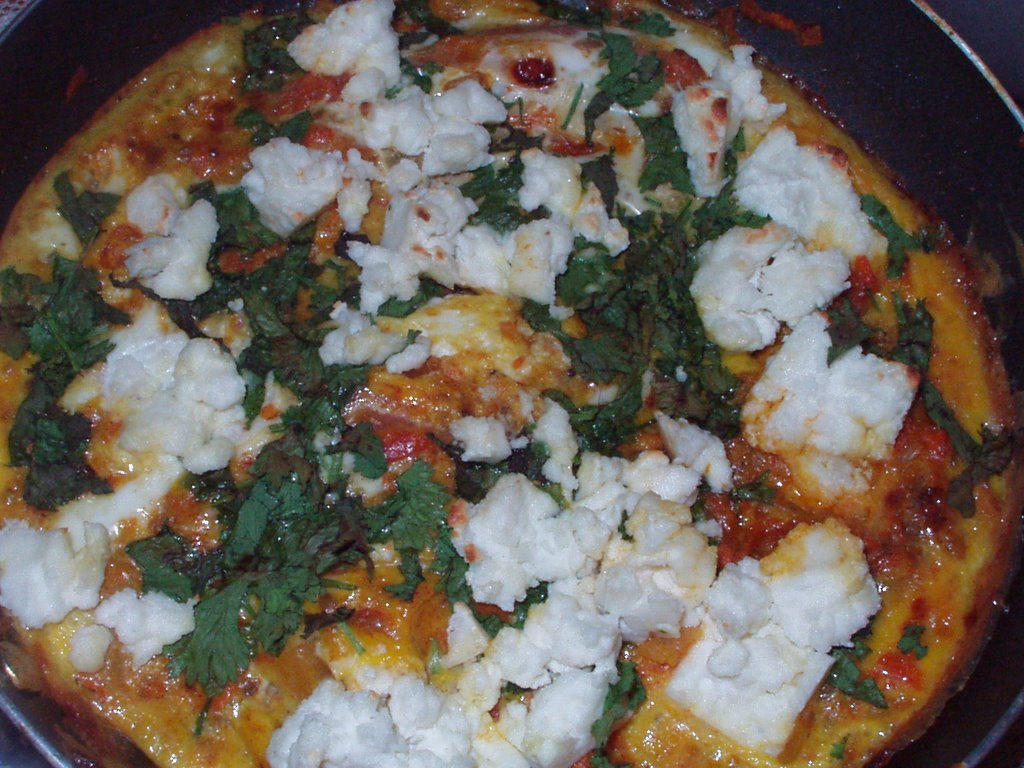
Easy, Speedy, Tasty - Egg Bhurji Frittata Style

Warning: No skillets were injured when making this recipe :) - read below for what I mean :)
Last week,came home from work one day, very tired with no energy to cook anything that would take a lot of time. I immediately thought of egg bhurgi with just onions. When I was in school here, I made this quite often when I was pressed on time. On one of those ocasions, I was in the process of making egg bhurji and one of my roomates asked me if I could try NOT to scramble the eggs. She asked me if I could try leaving them on the skillet on low heat so they cook all the way through without the need to scrambling them. She said her mom did it that way. I used to leave the eggs undisturbed on low heat for a while until they were set and flip it carefully if the top looked like it needed some cooking.

I started with the intention of making what I usually make but this time as I started chopping my onions, gathering other ingredients when I thought I would take this one step further by making a desi frittata out of it. I was only using 3 eggs, and I did not have a small enough oven-safe skillet. I then remembered Rachael Ray saying one time that her mom never distinguished between an oven safe skillet and a regular one. She went on to say that her mom always put aluminium foil on the handles and put the skillet in the oven. I decided to do it this way too and it turned out perfect. I wrapped the plastic handle of my skillet atleast 5-6 times with heavy duty aluminium foil before putting it in the oven!

I put grated carrots in this recipe, because I had only one lonely carrot in the refrigerator all by itself and I just decided remedy it of its lonlieness by pairing it up with some eggs and onions :). I really loved the crunch the carrot imparted to the bhurji. It is going to be my intentional addition from now on.

I know the ingredients list seems long for the title but believe me, it doesn't get easier than this :).

Now on to the recipie:

Software
---------------
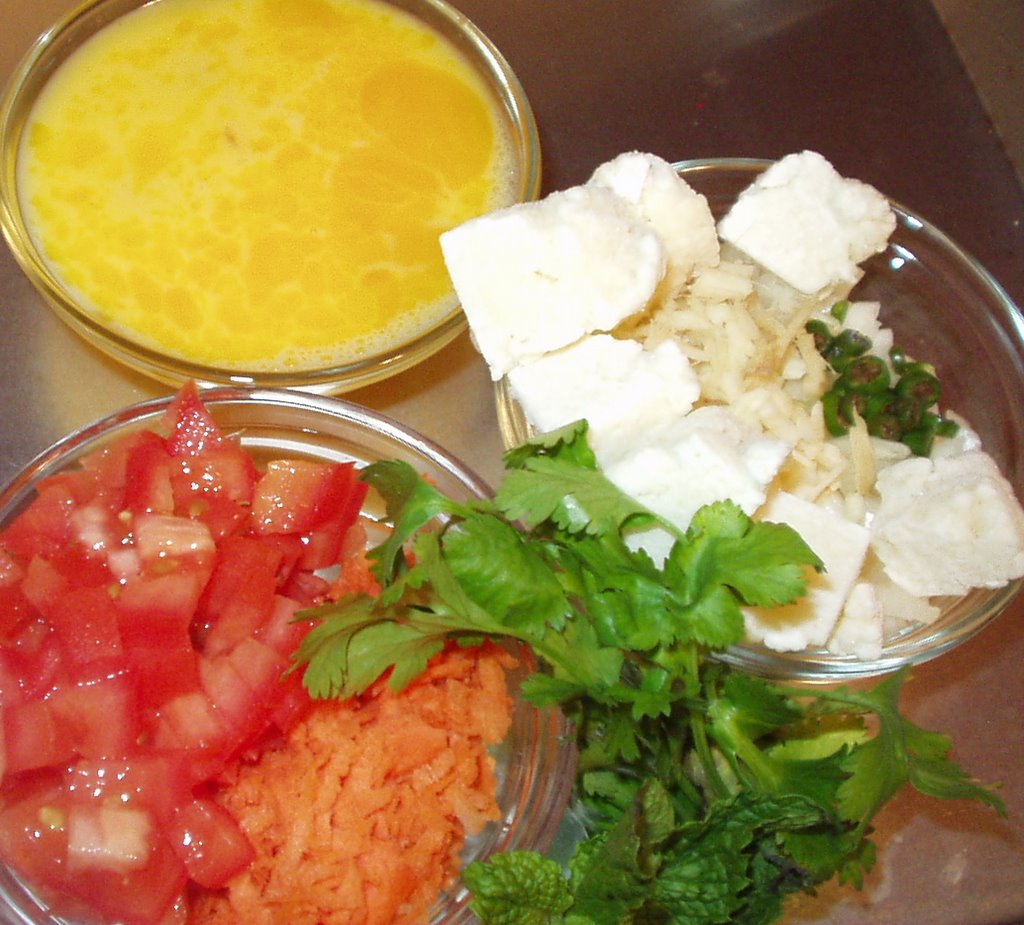
  • 1/2 small onion, finely diced
  • 1 garlic, finely sliced
  • one big carrot, grated
  • 1 small roma tomatoes
  • 3 eggs, slightly beaten
  • 1 Indian green chili, chopped fine
  • 1 tsp coriander powder
  • 1 pinch cumin powder
  • 1/2 tsp chili powder (optional)
  • 3-4 tbsp crumbled paneer
  • 1 tsp extra virgin olive oil
  • 4 tbsp chopped cilantro and chopped mint
  • salt to taste
Hardware
---------------
  • one small oven safe skillet or do what I did at your own risk :)
Method
---------------
  • Preheat oven to 400 degrees.
  • Heat the skillet on medium heat, add the onions, chilis and the garlic. Fry for a minute.
  • Add the grated carrots, tomatoes fry for another 1-2 minutes. Add the salt, cumin, coriander powder, chili powder an stir.
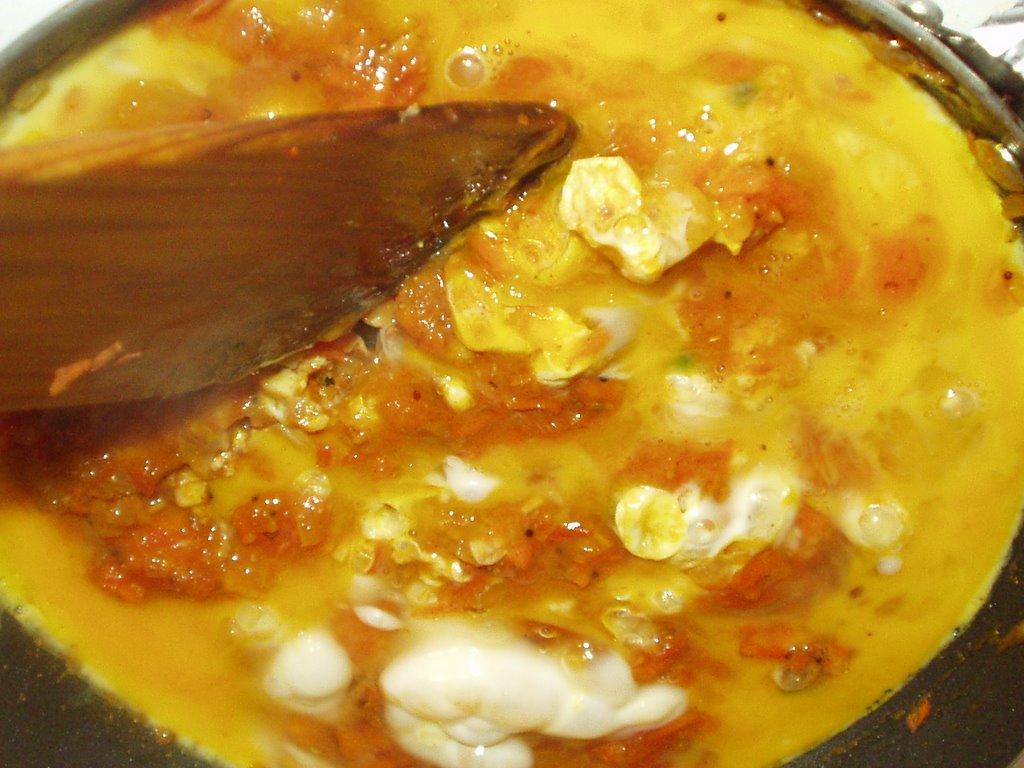
  • Add the eggs and cook for a minute or so. I usually make a slit with a flat wooden spoon in the middle and get the uncooked egg to flow in to the crack, eventually making it to the bottom of the pan.
  • Put the crumbled paneer, mint and cilantro and after the mixture is about half set, put the pan in the oven for about 10-15 minutes until the frittata is golden brown.


Serving Suggestion: We ate this up with some frozen store bought rotis and it was yum! But this could be served by itself on a brunch or for breakfast.

Thursday, May 04, 2006

Green Market and a Thai Salad for Friday Lunch

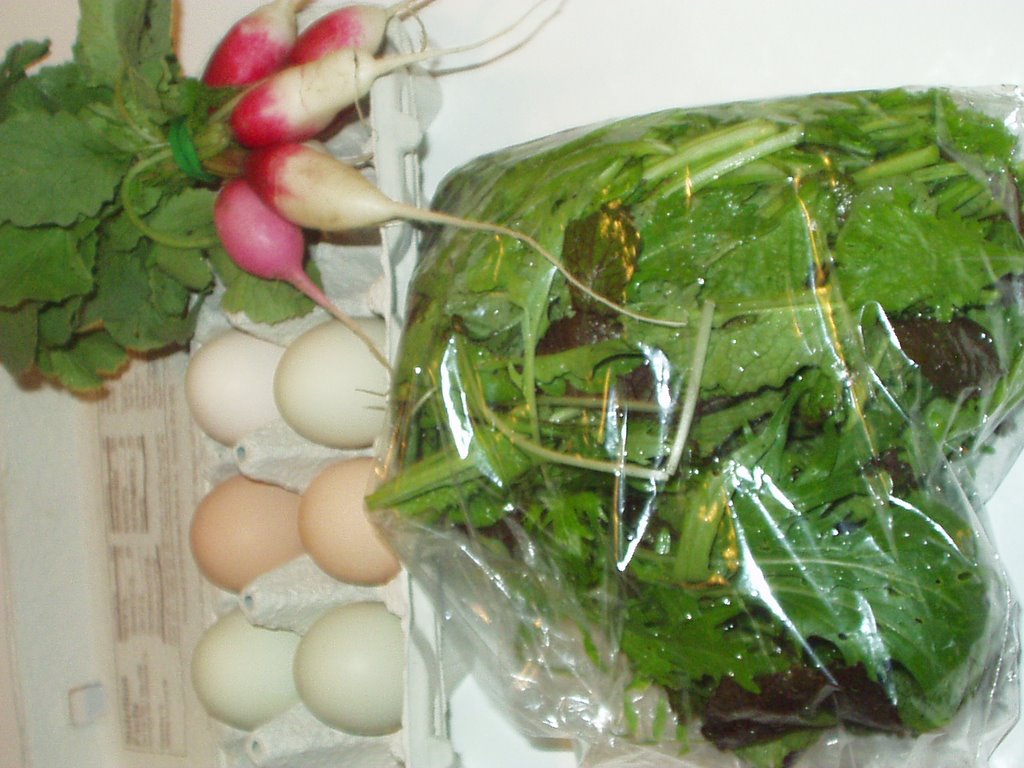
Every Wednesday night, there is a "green market" here in our town outside an organic food store under the building's awning. Local farmers who grow different veggies and greens put up stalls late afternoon. All the produce is hence organic and freshly picked. In addition to the fresh produce, they also have some baked goods like bread, baklava, organic chicken eggs etc. This is different than the regular Saturday morning farmers market that happens all through the Summer into the Fall.

I went over there after work yesterday. I had actually forgotten about this market when I went grocery shopping over the weekend. Since I already had an over flowing refrigerator, I couldn't shop as much as I wanted to. But I did buy some fresh "spicy greens" for salad, some fresh radishes and half a dozen eggs.

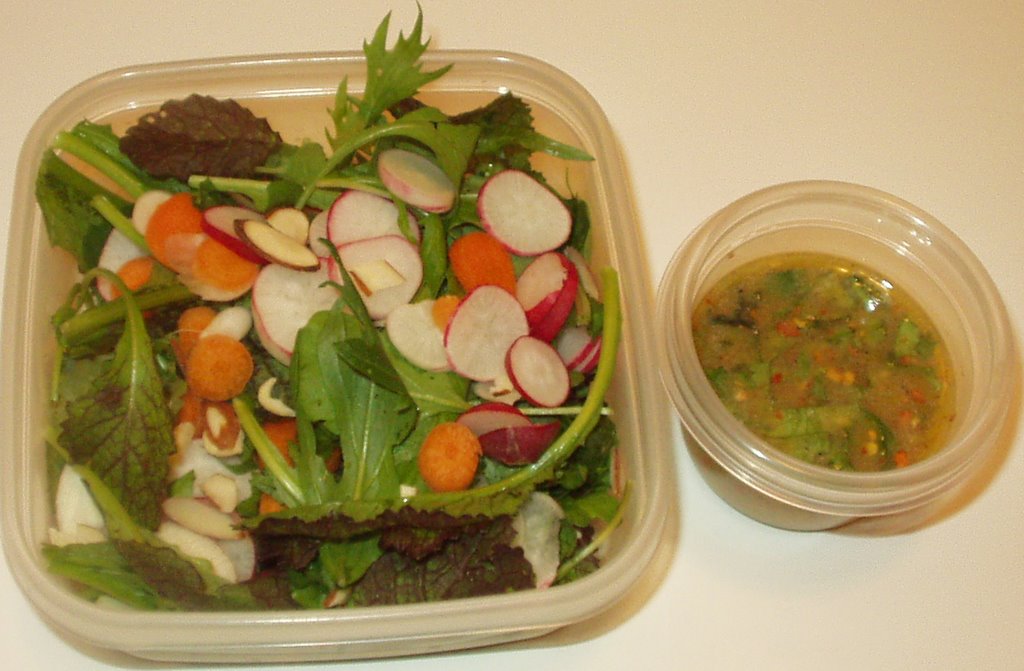
So, I put together a salad for lunch tomorrow with the greens and radishes.

Here is how I did it:

I cleaned the greens and radishes, chopped up about two of the radishes, also chopped up about 3 baby carrots, added lightly toasted almonds and walnuts for crunch. For the dressing, I used Jamie Oliver's Thai Salad Dressing. I didn't have any basil on hand so I just used fresh mint instead. I also omitted the red chili and instead went with a teaspoon of the wasabi paste for the kick (And I know wasabi is not exactly Thai but it is good, isn't it?). I also omitted the garlic cloves since I did not want to eat uncooked garlic in the middle of the afternoon at work!

Have a good weekend everybody!

Wednesday, May 03, 2006

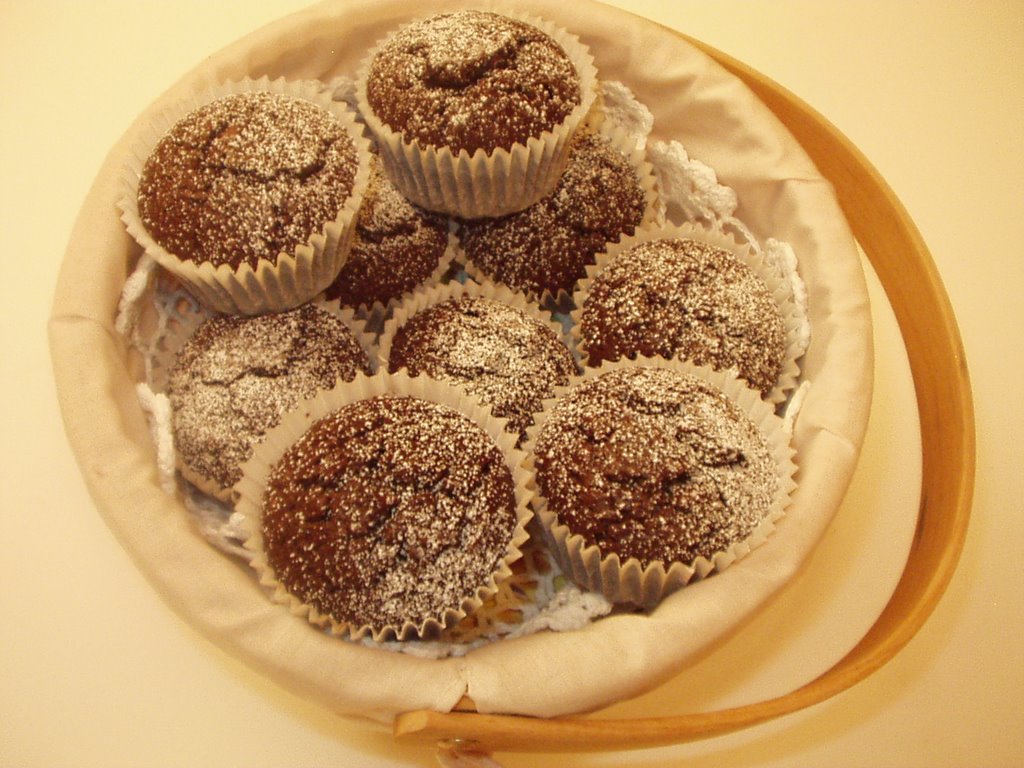
A basket full of chocolate cupcakes!

Update on May 05: Tony was kind enough to feature this in his weekend curry mela. Go check out the mela to see what other foodies have submitted!

Well..the basket of cupcakes didn't stay as full for long. They were gone very quickly! This is what I made late Sunday night when a "something chocolate" craving hit us. I thought of making pudding first but I didn't have any cream on hand so settled for the cupcakes. And the thought of letting the pudding cool in the refrigerator before we can devour it did not appeal to me. As I said, it was kind of late at night!

These cupcakes are very easy to make and take only 15-20 minutes of prep time. The rest of the time is baking time. Unless I am baking cupcakes for a party/give away, I never frost my cupcakes so I can avoid the extra sugar and all the work. I just sprinkle them with some decorative sprinklers or just a dusting of powdered sugar will satisfy my "frosting" desire!

I got the basic recipe from Hershey's Website. They are called "Spring Surprise Chocolate Cupcakes". I have made "filling/surprise" cupcakes before where a "surprise filling" is put in the cupcake and baked. When someone bites into the cupcake, they may either bite into the filling or see the filling and get "surprised"! Get it? I have done a cream cheese and chocolate chip filling, fresh raspberry filling, any kind of fruit jelly/jam fillings etc. Basically the surprise filling can be anything you fancy, just that if you put something heavy, you may risk the filling dropping to the bottom of the cupcake which is not such a good thing. May be next time I bake cupcakes, I will put a surprise filling in so I can capture that on the camera!

As with every recipe, I make, I did modify this recipe quite a bit. I added in flax seed flour, some nuts, some more chocolate, in a typical Rachael Ray style added some nutmeg, added salt, reduced the sugar etc. Here goes my recipe!


Software
---------------

  • 1 cup all-purpose flour
  • 1/2 tsp baking soda
  • 1/2 tsp salt
  • 1/2 cup flax seed flour
  • 3/4 cup sugar
  • 1/2 cup cocoa or dark cocoa
  • 1 tsp freshly grated nutmeg powder
  • 1 cup water
  • 1/2 cup vegetable oil
  • 1 egg
  • 1 1/2 teaspoon vanilla extract
  • 1/2 cup of finely chopped walnuts
  • 1 tbsp confectioners/powdered sugar

Hardware
---------------
  • one muffin pan
  • one large mixing bowl
  • one sifter
  • one small sifter

Method
---------------

  • Pre-heat the oven to 350 degrees.
  • Sift together the flour, salt and the baking soda into the large mixing bowl. Add the flax seed flour, cocoa, sugar and mix well with a fork so all the dry ingredients get mixed thoroughly. At this point the dry mix looks like a pre-packaged chocolate mix package.
  • Add in the water, oil, egg and the vanilla, beat at a medium speed using an electric mixer until the dry ingredients are well incorporated into the wet ones. Beat for 4-5 minutes until you see the bubbles on top. Mix in the nuts.
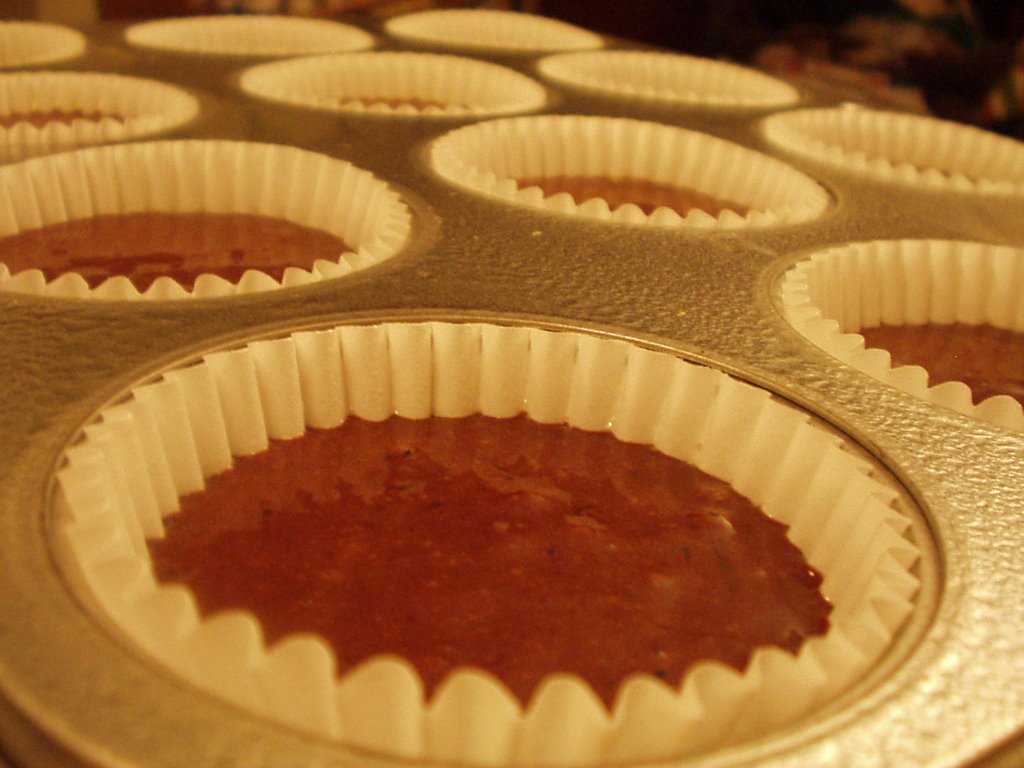
  • Put the paper muffin cups in the muffin pan. Fill the muffins until they are a little more than 3/4 full. Bake in the oven for 20-25 minutes or until a toothpick inserted comes out clean.
  • Cool on a wire rack.
  • After the muffins are completely cool, take the powdered sugar in a small sifter and "sift" the sugar on top the muffins!

This makes about 15-18 cupcakes.

Serving Suggestion: Serve with a tall glass of soy milk! YUM!

PS: This is a totally non-food related paragraph! Does anyone watch LOST on ABC? If yes, did you watch tonight's episode? My jaw totally dropped after watching it. I CANNOT believe they did what they did! This is probably the best episode this season in my opinion. Sorry, I just HAD to talk about it as I cannot seem to stop thinking about the episode!

Monday, May 01, 2006

Proud Owner of a Roti Grill - Thanks to Santhi

roti grill in action

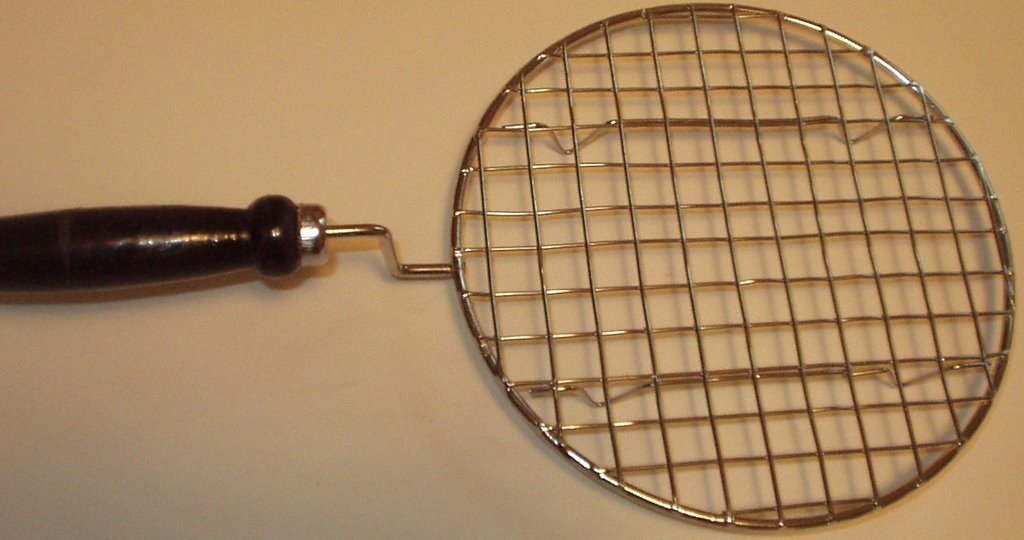
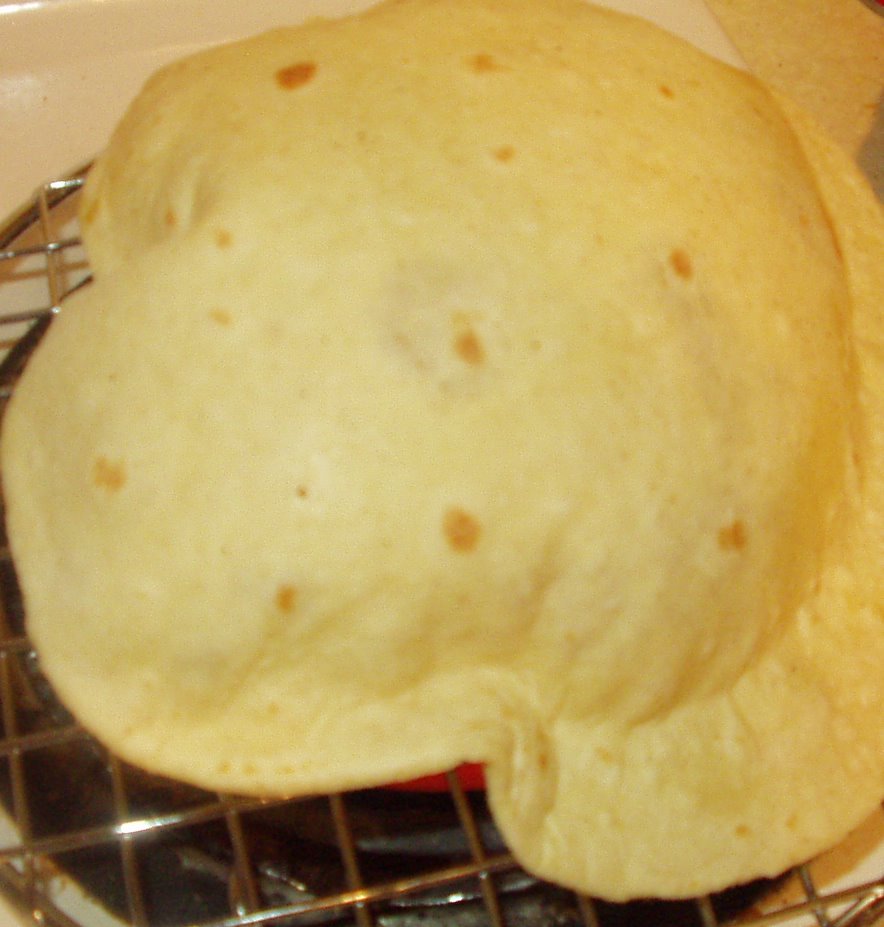
Thanks to Santhi of Me and My Kitchen, I am now a proud owner of a "roti grill". Santhi had read one of my comments on a blog where I commented on how I had never seen a roti grill in my life before. She immediately e-mailed me offering to send me one. It arrived last week in the mail. I couldn't wait to use it so I did get to use it over the weekend. This roti grill comes in handy for all those unlucky folks like me who have an electric range. If you have a gas range, you don't need this to make phulkas. Shammi of Food, in the main has an amazing post on phulkas!

Thanks again, Santhi. I will be thinking of you everytime I make phulkas/rotis!

roti grill

Sunday, April 30, 2006

Mamidikaya Pachi Pulusu

YAY! My second mango post of the year! Can you sense my excitement? The first dish was raw mango pulihora.

Usually when things are made with raw mango, it is best to use mangoes that are a little sour. Using the sweet raw mango does not do justice to this dish and the pulihora.

Firstly, I want to explain what this Telugu recipe title means. The word "mamidikaya" means raw mango. The word pachi means, raw. Pulusu is used primarily for tamarind sauce. The word pulusu originated from the word "puli" in Tamil which means tamarind. In this case though, there is no tamarind involved. I have my own reasoning of why it is called pulusu though. This same exact dish is made with tamarind pulp instead of mango. Now, way back when, who ever discovered that this could be made with mango, decided to just throw in the word mango infront of the already existing regular "pachi pulusu" ;). I could be totally wrong, so don't take my word for this :).

This particular dish "pachi pulusu" is very common in the "Telangana" region of my state Andhra Pradesh. This is a very easy recipe, that is usually served cold with hot rice. I only make this simple, comforting dish once or twice a year that way I feel it doesn't loose it's "charm" :). That is just my theory though!

As soon as Indira of Mahanandi announced the Jihva event and announced May's theme (mangoes), two dishes came to mind. One of them was mango jam (Indira has already blogged about it) and this one! I was hoping Indira wouldn't make this before me.
For the pulusu:

Software
---------------
  • 1 small-medium non-ripe mango (preferably sour)
  • 1/4 cup finely chopped onions
  • handful - chopped cilantro
  • salt to taste
Hardware
---------------
  • One medium sauce pan
Method
---------------
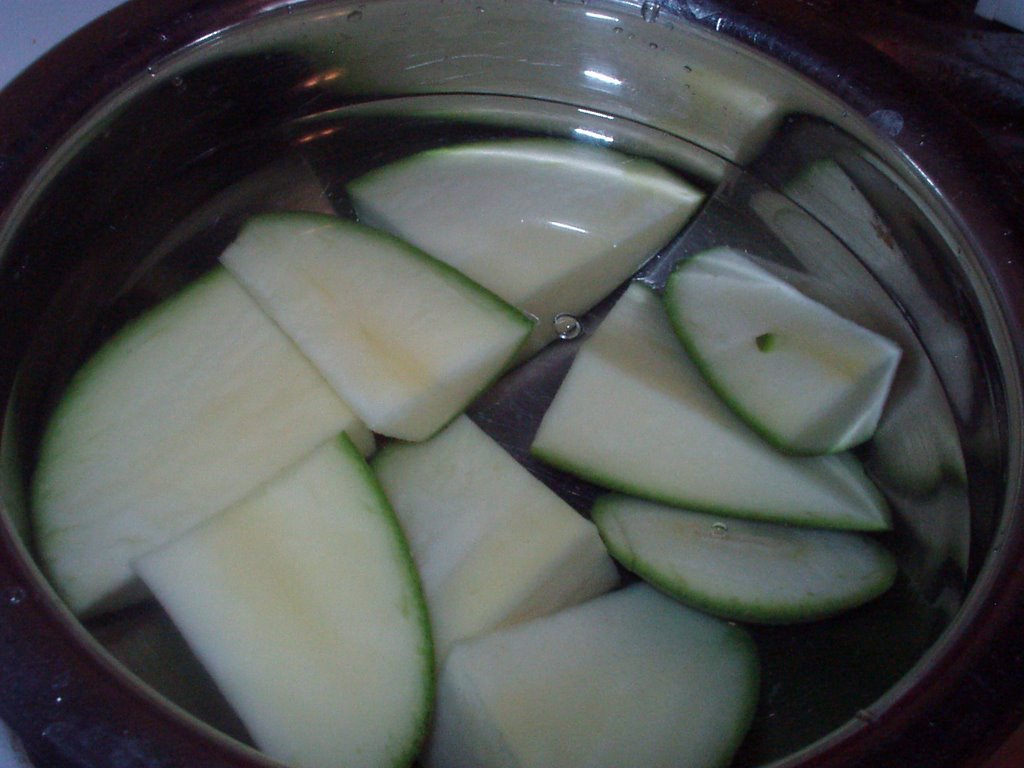
  • Peel the mango and cut the mango into 2-3 inch slices. Put the pieces in the pan, add water so that all the mango pieces are well covered and the water is a couple of inches above the mangoes. Add salt, and boil the mango on medium-high heat until the mango breaks apart when touched with a fork.
  • After the mango mixture is cold enough to handle, using a potato masher mash up the mango pieces or just use your hand and mash it up. I put 4-5 ice cubes in the mixture to ensure fast cooling.
  • Add more water as necessary, so it has the soupy, rasam consistency. Add the onions and the cilantro. Keep aside.
For the tempering or tadka:

Software
---------------
  • 1 tbsp extra virgin olive oil
  • 3-4 Indian green chilis, sliced legthwise in half
  • 1 broken red chili pieces
  • 1 tsp jeera seeds
  • 1 tsp black mustard seeds
  • 1 sprig curry leaves, cut in half
  • 1/2 tsp turmeric powder
  • 1/2 tsp coriander powder
Hardware
---------------
  • Small cast-iron skillet or a small saucepan
Method
---------------
  • Add the oil to the pan. Add the remaining ingredients, in the same order and turn off the heat after the mustard and jeera seeds splutter.
Add the above tempering to the pulusu prepared in the previous step. Check for salt and add more if necessary.

Serving Suggestion: This is best served with hot rice. It is also good after it rests for a couple of hours so the flavors get absorbed.

Update: In the above post, I first ask to peel the mangoes then boil them, but if you see the picture, I did not peel the mangoes before I boiled them. I did it the way mom does it back home. After the mangoes are mashed up the skin is extracted out and discarded. Since that seemed like a cumbersome method than first peeling and boiling the mangoes, I wrote up the post that way! I am surprised that no one noticed it and asked me about it :)!

Tuesday, April 25, 2006

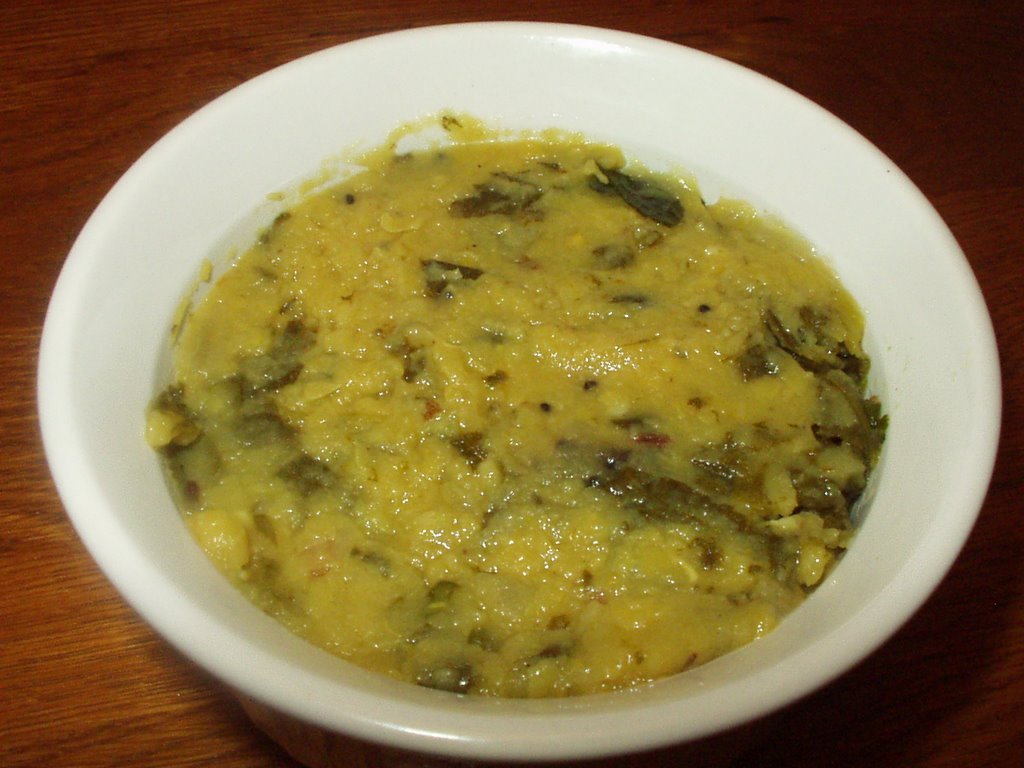
Yu Choy Dal/Pappu

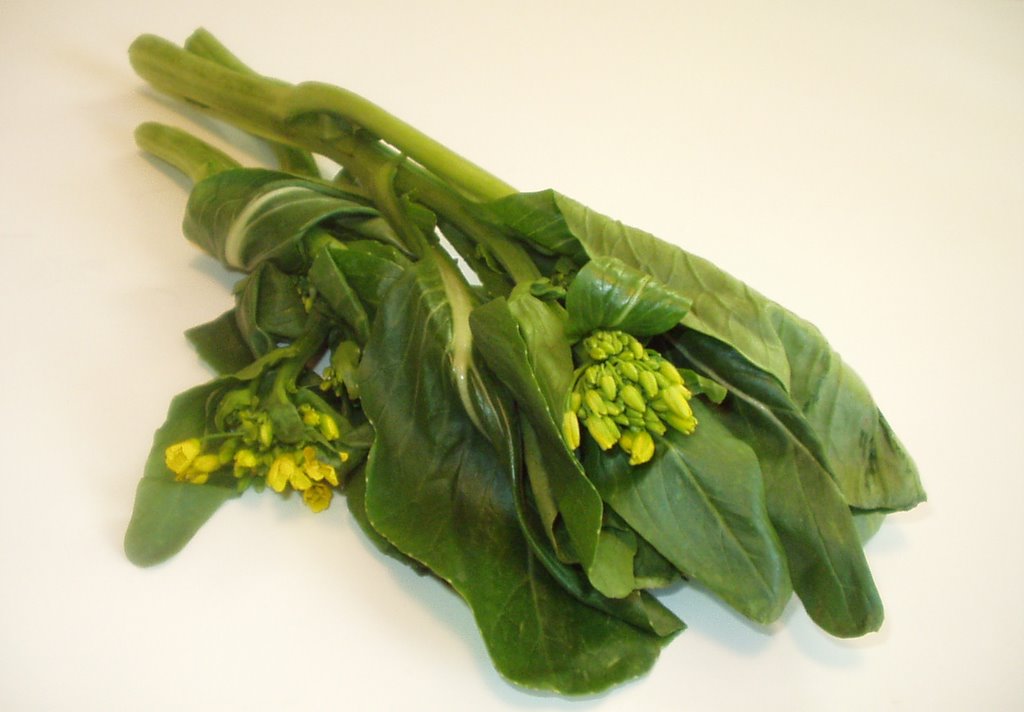
On my way out of the Oriental Store last week my eyes fell on the counter and I saw a bunch beautiful green leafy vegetable stalks that had tiny yellow flowers. I asked the person-in-charge what the green was and she said it was "Yu Choy". I asked her if she knew how the vegetable tasted. She said it tasted like spinach and offered me some to try. I tasted it and I felt like it tasted like spinach too :).

For a green leafy vegetable deprived Indian here in the US, I jumped at the opportunity. I bought half a pound of it. When I came home, I googled the name and found a TON of references to it. I learnt that Yu Choy is edible rape and it is widely used in Chinese cooking. It is used to make soups and also used in stir fries. That is all I needed to know make "Yu Choy Dal" out of it. I basically plucked the leaves from the stalks and roughly chopped them up. I did not have the hearts to throw away the stalks so I just ziplocked them and put them back in the fridge. I am thinking about throwing them into some soup.

Now coming to the dal, I did spice the dal up a bit than I usually do by adding cloves + cinnamon + elaichi powder, a tsp of coriander powder, a tbsp of ginger. When the dal was cooking, it eminated a lot of fragrance than when I cook a regular spinach dal. It was hard for me to figure out if it was because of the additional spices I added or just the Yu Choy itself smelled so good. But whatever was the case, it just made it really hard to wait for it to finish cooking. I had to release the pressure for the cooker manually just so I could get my hands on the dal. And I should mention that this is a very easy recipe to make.

On to the recipe now

Cooking the dal

Software
---------------
  • 1 cup toor dal
  • 1/2 lb Yu Choy with stalks, leaves plucked and chopped. Roughly 2 cups of packed, chopped Yu Choy leaves
  • 1 medium onion, coarsley chopped
  • 2 cloves garlic, minced
  • 4-5 Indian green chilis, split in half
  • 1 tbsp finely chopped ginger
  • 1/2 tsp turmeric powder
  • 1 tsp coriander powder (optional)
  • 1/2 tsp (cloves + cinnamon + caradamom) powder (optional)
  • salt to taste
Hardware
---------------

Pressure cooker

Method
---------------
Put all the above ingredients in a pressure cooker and add about 4 cups of water and pressure cook until 3 whistles.

For tempering/tadka

Software
---------------
  • 1 tsp extra virgin olive oil
  • 1 tsp mustard seeds
  • 1 tsp jeera seeds
  • 1 tsp urad dal
  • 1 broken red chili pieces
  • 1 sprig curry leaves, chopped in half
Hardware
---------------
Small cast iron skillet/tempering pan or smallest sauce pan available

Method
---------------
Put the oil in a pan on medium-high heat, add all the ingredients in the order listed. Take off from heat after the mustard and jeera seeds splutter.

Add the tempering to the dal above, garnish with chopped cilantro.

Serving Suggestion: This goes really well with chapathi or rice.

This is also my entry to Sweetnick's ARF/5-a-day Tuesday this week!

Wednesday, April 19, 2006

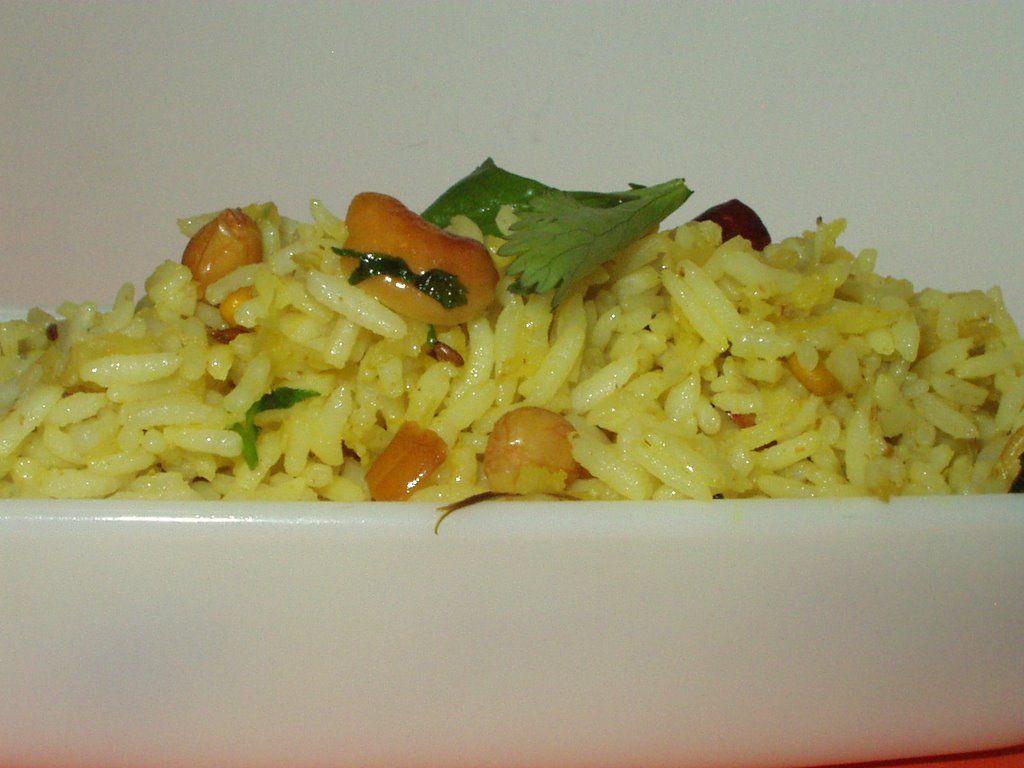
Mango Pulihora - Mamidikaya Pulihora

This is my first mango post of the year! YAY. I am so excited. If I was asked to pick one fruit to take with me to live on a deserted island, I would most definitely pick Mango. When I was in India, in the summer months, we practically lived on Mangoes. There used to be days where every dish cooked for lunch/dinner had a hint of mango in it - starting from drinks, to main course to dessert because of the abundance of the mangoes. Sadly, it is not the case here. I bought raw mangoes at over 2 dollars a pound here :( and it does not take a lot of mangoes to put a hole in the pocket.

Indira of Mahanandi has blogged about this recipe before. My recipe is akin to hers except for a few minor changes. Back home in India, this pulihora is made for the first time that particular year on Ugadi day. It so happened way back when that raw mangoes appeared in the markets only a day or prior to Ugadi but in these days, you see them a lot earlier than that. But my mom tries to keep the tradition alive by NOT cooking anything with raw mangoes before Ugadi even though the rest of the family wasn't fair :).

Here goes the recipe..

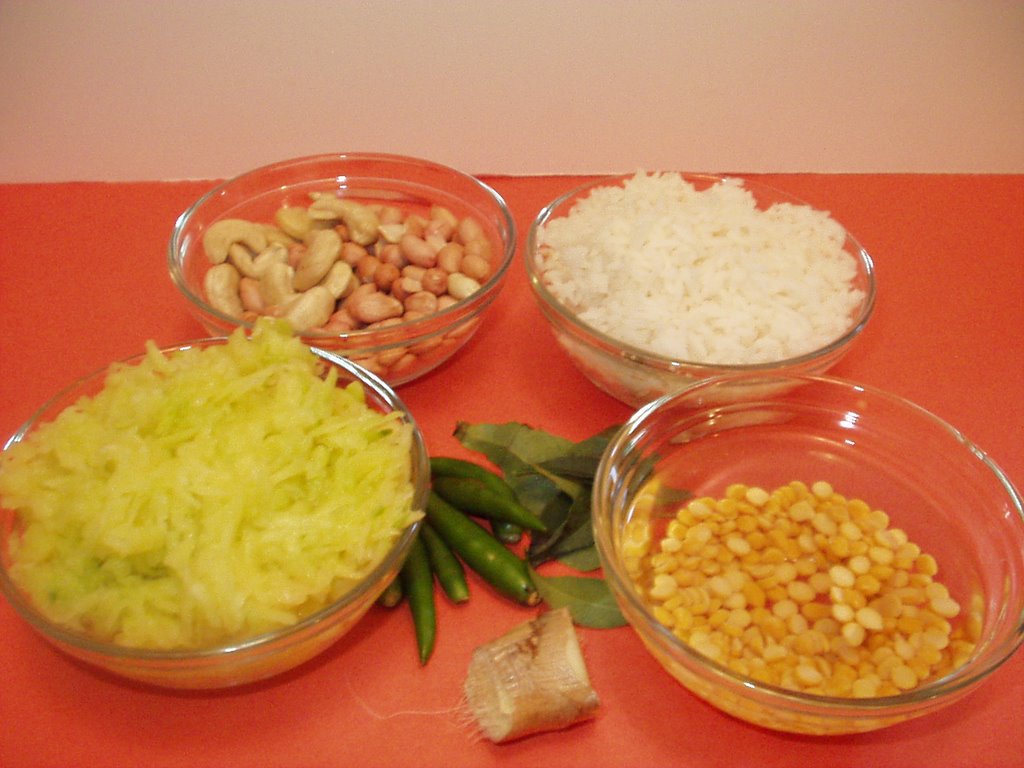
Software
---------------
  • 2 cups cooked rice - with grains seperate (I used sona masuri)
  • 1 to 11/2 cups peeled, grated mango
  • 5-6 Indian green chilis - slit lengthwise
  • 2-3 broken red chili pieces
  • 1 tbsp ginger grated/chopped fine
  • 1/4 cup broken cashew pieces
  • 1/4 cup raw peanuts
  • 1 tbsp chana dal soaked in hot water for 5-10 minutes
  • 1 tsp mustard seeds
  • 1 tsp jeera seeds
  • 1 tsp turmeric powder
  • 1 tsp coriander powder
  • 1 sprig curry leaves
  • 2-3 tbsp extra virgin olive oil/any other oil you prefer
  • one handful chopped cilantro (optional)
  • salt to taste
Hardware
---------------
One pan

Method
---------------
  • Put the pan on medium heat. Add the oil.
  • Add the slit green chilis and the red chilis. After about 30 seconds, add the curry leaves, ginger and the cashews. After about another 30 seconds, add the raw peanuts. Fry this until the cashews and peanuts are slighly golden brown. Add the soaked chana dal. Fry for another 30 seconds.
  • Add the mustard seeds and the jeera seeds. After they splutter, add the turmeric powder. Stir well.
  • Add salt and coriander powder, stir. Add the grated mango, chopped cilantro and fry by stirring for another 1-2 minutes. Turn off the heat.
  • After this mixture cools down until you can handle, mix it with the cooked white rice. Use your hands so the mixture gets incorporated well with the rice (wear food-safe gloves to avoid the yellow color on your hands).
  • Serve!

Friday, April 14, 2006

My Take On Asparagus Poriyal/Vepudu (with dal powders)

I have never made poriyal before. Sure, I did saute veggies before and added coconut to it. I am not sure if that is poriyal though. I would love to be enlightened :). Poriyal as far as I know is a Tamil dish and basically a dry saute of veggies without adding any water. I am not sure if the word alone means something. Tamil friends, please enlighten me here :).

I had some asparagus leftover from my sphaghetti squash and asparagus lettuce wraps and decided to cook them up Tamil style. I say "my take" in the title above because I *think* I may have altered the basic poriyal recipe by adding some additional ingredients especially the masala. I had seen one of my Tamil friends do this for a totally different recipe and I felt like adapting it :).

Okay, so here I go!

Making the masala

Software
---------------
  • 3 tbsp chana dal/shanaga pappu
  • 2 tbsp urad dal/minapa pappu
  • 2 tbsp toor dal/kandhi pappu
  • 2 tbsp coriander seeds/dhaniyalu
  • 8-10 Indian red chilis/mirchi
Hardware
---------------
one small pan

Method
---------------
  • Dry roast all the ingredients seperately and cool. Grind everything in a spice grinder. You will only need about 3 tbsp of this masala for the asaparagus. Store the rest in an air tight container for later use.
Making the poriyal

Software
---------------
  • About 20 stalks of asparagus
  • 1 medium onion, chopped finely
  • 2 cloves garlic, minced
  • 1 inch ginger, minched
  • 2 tbsp of freshly grated coconut (or dry if fresh not available)
  • 1 tsp mustard seeds
  • 1 tsp cumin seeds
  • 1 sprig curry leaves, cut in half
  • 3 tbsp of the above masala powder
  • salt to taste
  • 1 tbsp extra virgin olive oil
  • 4 tbsps of chopped coriander leaves
Hardware
---------------
One pan

Method
---------------
  • Cut off the woody stems on one end. To easily tell where to cut, Hold one asparagus in your hand and slowly bend it, it naturally breaks into two pieces, about 2-3 inches on one end. Cut the other asaparagus stalks using the same method, using the one broken one as a guide.
  • Then cut the aspargus into very small pieces - about 1/2 inch pieces.
  • Put the pan on medium heat, add the oil to the pan, add the mustard and cumin seeds. Add the curry leaves after they splutter. Add the onions and fry until they are translucent. Add the garlic and ginger, fry for a minute or so.
  • Add the asparagus pieces, stir, cook for a couple of minutes. Add salt.
  • Increase the heat to medium-high, cook for about 5-10 minutes until the asparagus is soft. I had to add about 1/3 cup of water to help it cook half way through the process because it was sticking to the pan. But the water eventually evaporated so that wasn't an issue.
  • Sprinkle about 3 tbsp of the masala to the asparagus, stir and cook for another couple of minutes. Turn of the heat.
  • Sprinkle the cilantro leaves.
The poriyal was surprisingly good. I could not believe how easy it was and how wonderful it tasted. I think I took the poriyal off the heat before it was all the way cooked so it still had the crunch to it and I loved it. So it is up to you, you can either cook it until it is totally soft or leave a little crunch to it. Asparagus is going to make it to my shopping list more often now!

Serving Suggestion: I ate this with both chapathis and rice with some rasam and it tasted heavenly both ways.

PS: Two of my three entries (spinach chutney w/ chapathi chips and panini - desi style) submitted for VKN's cooking competetion have been selected for voting. If you like my entries, please show your support by voting for my entries. Thank you!