Friday, March 31, 2006

Spicy Indian Hummus with Grilled Greek Pita

This is my entry to Anthony's Curry Mela this week.

I gave hummus an Indian makeover by adding some Indian spices and adding sesame seeds instead of the tahini paste.

Hummus Recipe

Software
---------------
  • 2 cups chickpeas (soaked overnight and cooked in a pressure cooker, reserve some cooking water)
  • 1/4 cup sesame seeds
  • 3-4 cloves garlic
  • 1 tbsp coriander powder
  • 1 tsp coriander powder
  • 2 tsp chili powder (or less)
  • 1/2 tsp garam masala
  • 1/2 lemon, juiced
  • 5-6 tbsp extra virgin olive oil
  • salt, to taste
Hardware
---------------
  • Food processor

Method
---------------
  • Toast the sesame seeds on low heat until they pop and release the oils.
  • Put the sesame seeds in a blender and powder them.
  • Add the chickpeas, garlic cloves, all the spices, the salt, the lemon juice and blend. Stream in the extra virgin olive oil into the food processor as it is blending. If the mixture becomes to thick add some reserved cooking liquid from the chickpeas that were cooked above.
  • Cover and refrigerate.

Pita Bread

I got the regular Greek pita bread at the grocery store, heated up my grill pan, sprayed some pam on one side and grilled it on medium-low heat so the outside becomes crunchy but the inside of the bread is still soft. Spray pam on the other side and repeat. Cut into wedges and serve with the hummus.

The possibilites of hummus are endless - I have eaten it with crackers, chips, pita bread, fresh veggies, a veggie sandwich etc.

Wednesday, March 29, 2006

Ugadi - Ushering the New Year

It is two-post-Wednesday today. Do check out my other post today - an entry to Hooked on Heat's Fusion theme this month.

Vyaya Nama Samvatsara Shubhakanshaklu to everyone. I hope this year brings everyone happiness, prosperity in everyone's lives and in the food blogging world :).

Each Telugu new year has a name associated with it and this years' name is "Vyaya" meaning "expenditure". There are 60 new year names and the names repeat after 60 years. For the curious minded, the other names are here.

More information about Ugadi is available on the following Websites

Ugadi - details
Wikipedia Entry

Fusion - Malai Kofta with Chinese Rice Noodles

I made malai kofta over the weekend for a party and I just used the leftovers to make up malai kofta with chinese rice noodles for Meena's Hooked on Heat - Fusion theme. I was very skeptical of doing this but the end result was really good. I bought the Chinese rice noodles from an oriental store for 89 cents a package and it was a huge package as you can see in the picture below. I only made about 1/2 of the package and later realized that there were a LOT of noodles for the malai kofta I had. But no biggie, as I said I only paid 89 cents for the package. I did stow away the leftover noodles in the refrigerator but I am not sure if I would be able to use them again.

I am dividing this recipe up into different sections so it is easier to follow.

Warning:
---------------
This recipe will make about 30-35 koftas. Please reduce/add the ingredients accordingly to your needs.

Malai Kofta Recipe

Masala
---------------
  • 2 inch Indian cinnamon stick
  • 8 green caradamom pods
  • 8 cloves
  • 2 tsp black pepper corns
  • 1 tsp caraway seeds/shahjeera
  • 2 tbsp coriander seeds/dhaniya

Dry roast all the spices above and dry grind them. Set aside.

Sauce or Gravy for the koftas

Software
---------------------
  • 1 medium onion, diced fine
  • 2 cups tomato puree
  • 1 cup canned tomato paste
  • 1 cup khoya/ricotta cheese
  • 1 cup paneer crumbled
  • 1 cup cashewnuts, soaked in water
  • 1/4 cup Indian poppy seeds,dry roasted
  • 1 inch ginger root, minced
  • 3 cloves garlic, minced
  • 1 tsp nutmeg powder
  • 3/4 th of the masala powder above
  • 2 tbsp butter
  • 1 tbsp extra virgin olive oil
  • red chili powder, to taste
  • salt, to taste
Hardware
---------------
  • One wide saucepan
  • One food processor/blender
Method
---------------
  • Wet grind the cashewsnuts, roasted poppy seeds, ricotta cheese and paneer. Keep aside.
  • Heat the saucepan on medium-high, add the butter and oil, add the onions. Fry till they are translucent.
  • Add the ginger and garlic, the tomatoes puree and the tomato paste and heat through until the raw smell of the tomatoes goes away.
  • Add the wet-ground paste above, stir, add the dry ground masala above, nutmeg, salt and stir. Add more water if necessary. Bring it to a boil.
  • Taste the gravy to see if red-chili powder is needed. If you want the gravy to have a little more spice, add some red chili powder.
Koftas


Hardware
---------------
  • Baking sheet
  • Mixing bowl
Software
---------------
  • 1 pound potatoes
  • 1 cup crumbled Paneer
  • 1 cup ricotta cheese
  • 1/2 cup cashenuts, coarsly chopped
  • 1/2 cup golden raisins, chopped into half
  • 1 inch ginger root, crushed to a paste
  • 3 cloves garlic, crushed to a paste
  • 1 tsp cumin seeds
  • 3-4 Indian green chilis chopped fine
  • 1 medium onion chopped fine
  • 1/4 th of the masala powder made above
  • 3 tbsp chopped cilantro
  • 3 tbsp chopped mint
Method
---------------
  • Boil the potatoes in water, peel and mash them completely.
  • Mix together the rest of the ingredients and make them into ping-pong sized balls.
  • Spray the baking sheet with cooking spray and arrange the kofta balls in a single layer.
  • Bake in a preheated oven at 350 degrees for about 5-10 mins. Broil for a couple of minutes until tops are golden brown. Using a pair of tongs, turn the kofta balls so the bottom side is up and repeat the same. The second side will take a lot less time, so be careful.
  • Alternatively, you can deep fry the kofta balls in oil.
Bringing the kofta ball and the gravy together

About 10-15 minutes before serving add the hot gravy to the kofta balls. Garnish with a handful of chopped cilantro and chopped mint.

Serving Suggestion:This goes very well with paratha, chapathi, puri, rice, fried rice etc.

For the chinese rice noodles

Software
---------------
  • Rice noodles, one half package
  • 2-3 springs of green onions, chopped
  • 2-3 eggs
  • 1/2 tsp blackpepper
  • 1 tbsp soy sauce
  • 1 tbsp of sesame seed oil
  • 1 tsp of any oil for the noodles
Hardware
---------------
  • Sauce pan to boil the noodles
  • Colander
  • Non-stick fry pan
Method
---------------
  • Heat water in the sauce pan and bring it to a boil. Add the salt and the drop the noodles. Add the 1 tsp of oil. Check for doneness after about a couple of minutes because they cook very quickly. I cannot emphasize this enough :).
  • After the noodles are done, quickly drain them in a colander and rinse under cold water and drain. Fluff up the noodles, so they don't clump together. Drain completely.
  • Heat the skillet and put the 1 tbsp of sesame oil. Add the eggs and scramble them. Add the black pepper, soy sauce and half of the green onions.
  • Add the noodles and stir fry until the noodles are heated through completely.
To Serve
---------------

Plate up some noodles and add the malai kofta curry on top. Garnish with left over green onions.

Tips and Suggestions: If you do not have the sesame seed oil, just add any oil that you own. I love the sesame seed oil flavor in Chinese cooking.

Monday, March 27, 2006

Chinese and Indian Bitter Melon/Gourd Fry (Kakarakaya Vepudu)

I had 2 Chinese bitter melons and 2 Indian bitter melons/gourds in the refrigerator and I decided to cook up an Andhra style fry/vepudu using them both. You could use all Chinese bitter gourds or Indian bitter gourds for this recipe.

Software
---------------
  • 2 Chinese bitter melons/gourds
  • 3 Indian bitter melons/gourds
  • 1 tsp jeera/jeela karra
  • 1 tsp black mustard seeds/aavalu
  • 1 sprig curry leaves, chopped fine
  • 1 large onion, chopped fine
  • 2 tsp chili powder/mirapapodi/lal mirchi
  • 1 tsp coriander powder/dhaniya podi
  • 2 tbsp chick-pea flour/besan
  • 2 tsp turmeric powder/pasupu/haldi (to marinate)
  • 1 tbsp salt (to marinate)
  • salt, to taste (for the fry)
  • 1 tbsp extra virgin olive oil
  • chopped cilantro leaves
Hardware
---------------
  • 1 medium sized mixing bowl
  • 1 non-stick fry pan
Method
---------------
  • Pile them all up in the mixing bowl, add the turmeric and the salt. Cover and leave aside for a minimum of 1 hr. You could marinate if for a little less time too. I usually just marinate it before I leave for work in the morning so it is ready by the time I get home.
  • After the marination is done, take handfuls of the bitter gourd pieces (wear kitchen gloves if you don't want yellow color on your hands for atleast a day :-)) and squeeze the juice out of the gourds. The more juice you squeeze out the better.
  • Put the non-stick pan on medium-high heat and add the oil. Add the bittergourd pieces and fry on medium heat until they are half cooked. Add the onions, curry leaves, jeera, salt and mustard seeds and fry everything until the bittergourd pieces are completely dry and the onion is cooked. Add the besan and stir.
  • Turn off the heat, add the coriander powder and the chili powder and stir. Add the cilantro.
Serving Suggestion: This goes really well with sambhar/rasam and rice.

Saturday, March 25, 2006

Extreme Makeover to Paula Deen's Pumpkin Bars - Pumpkin-Chocolate Chip Bundt Cake

Whoever says we can't eat pumpkin cake in March, I disagree with them. Pumpkin not only makes a great Thanksgiving ingredient but also a good all-year round ingredient. I love pumkin as long as it is in a cake form. I cannot tolerate pumpkin pie.

Paula Deen baked up some pumpkin bars on one of episodes following Thanksgiving weekend. She said it is a great way to use up leftover pumpkin. That recipe intrigued me a lot and I did make the pumpkin bars the very next weekend following her show. I also made the cream-cheese frosting for the bars.

Today, I wanted to make something more than just bars. I decided on using the same recipe(with some changes, of course) but baking it in a Bundt pan (this link takes you to Wikipedia's entry on Bundt cake. It has some very interesting facts about the origin of the cake and the pan etc,.). I have a 10-cup Nordic Ware Star Bundt Pan(red color) that I bought on impulse almost 4 years ago but it lied un used in my cupboard up until 2 years ago when I discovered the pan's magic. In my experience all the cakes I have baked in a bundt pan come out much more moister than when baked in a regular round/rectangular cake pans. And the cakes look much more prettier on a bundt cake with minimal decorations :).

The Bundt cake reminds me of a scene from the movie "My Big Fat Greek Wedding" where
Ian Miller's family comes to visit Toula's family for the first time and Ian's mom brings a bundt cake. Toula's mom Maria takes the cake and exclaims "there is a hole in this cake". She then leaves and later emerges with the cake with a plant inside the "hole" of the bundt cake. That scene just cracks me up everytime I watch the movie.

As I said before, I did modify Paula Deen's recipe by adding less sugar, less eggs, reducing the amount of flour and adding flax seed flour instead etc. I promise that the end result will be a very moist pumpkin cake. The addition of the flax seed flour gave it a really good texture. Read on for the recipe.

Software
---------------
  • 3 eggs
  • 1 cup vegetable oil
  • 1 cup sugar
  • 1 15 -oz canned pumpkin
  • 2 cups sifted all-purpose flour
  • 2 tsp baking powder
  • 2 tsp ground cinnamon
  • 1 tsp ground nutmeg
  • 1 tsp salt
  • 1 tsp baking soda
  • 1 tbsp vanilla extract
  • 1/2 cup semi-sweet chocolate chips
  • 1/2 cup white chocolate chips
  • 1 tbsp confectioners'/powdered sugar
  • Cooking spray to spray the pan
Hardware
---------------
  • One large (5 qt) mixing bowl
  • One medium (3-4 qt) bowl
  • One 10 cup Bundt Pan
Method
--------------
  • Preheat the oven to 350 degrees.
  • Sift together the flour, baking powder, baking salt, cinnamon, nutmeg, salt and baking soda into the medium bowl. Add in 1/3 cup of flax-seed powder. Keep aside.
  • Break the eggs into the large mixing bowl, add sugar, oil and the pumpkin. On medium speed, using a hand blender blend for atleast 5-7 minutes until bubbles start forming on top.
  • Add the flour mixture from the previous step gradually and beat on low using the hand blender. Do not add all the flour at once as it will not incorporate into the egg mixture. Add it in batches.
  • Spray the bundt pan with the cooking oil spray generously making sure you cover all the nooks of the pan.
  • Pour the 1/3rd of the flour mixture into the pan. Scatter 1/4 cup each of the chocolate chips on top of the flour mixture in the bundt pan.
  • Pour another 1/3rd of the flour mixture into the bundt pan on top of the chocolate chips.
  • Repeat with the remaining chocolate chips and top off with the remainder of the flour mixture.
  • Bake in the preheated oven for about 50-55 minutes or until a toothpick inserted comes out clean.
  • After the cake is done, remove it from the oven and cool for about 30 min on a wire rack in the pan, then invert the cake onto the wire rack and cool completely.
  • Place the cake on a serving platter, invert it from the step above (the top of the cake should be the flat one and not the curvy one). Using a bread knife, carefully cut off the part of the cake that has sprung up during the baking process so the top is leveled. Eat the cake shreds :)
  • Re-invert the cake so the flat side is down.
  • Put the 2 tbsp of the confectioners' sugar into the smallest sieve you have (use my tea sieve) and move it across the cake so the sugar covers the cake. The top part of the cake should have a little more sugar than the sides.
Tips and Suggestion: The addition of flax-seed flour is optional. I added it for health reasons. You can use all flour if needed.
Addition of chocolate-chips is also optional. The semi-sweet and the white chocolate chips can be interchanged.
Serving Suggestion: Cut up the cake into pieces and serve with a dollop of whipped cream, if desired.

Thursday, March 23, 2006

Look What I Found - Mini Pie Crusts


I was exicted to see these mini pie crusts at the grocery store tonight. I always crave for pie but I never venture out to make a whole pie (unless I am giving/taking it to someone) because I am afraid I would be eating that all week and getting fat :-). So as soon as I these pie crusts in the baking aisle, I picked one up. It comes in one package with 6 individual small pie shells. These could be used for a party too, just fill it with different toppings :).

Watch out for some recipes soon!

Wednesday, March 22, 2006

Methi Paratha

Added on Friday, March 24: This is featured in Anthony's Curry Mela this weekend!

I had got some fresh methi leaves from the International store and did not want to make what I usually make with them, the dal. I wanted to make something else. So I made the methi parathas. To my surprise they turned very good and moist. The following is the recipe.

Software
---------------
  • 1 cup fresh methi leaves, coarsely chopped
  • 2 cups chapathi flour
  • 1 tsp chili powder/mirapa podi/mirchi
  • 1 tsp ajwain seeds
  • 1 tsp salt, or to taste
  • 1 tsp garam masala
  • vegetable/peanut oil, to fry

Hardware
---------------
  • one mixing bowl to mix the dough
  • one skillet to fry the parathas
Method
---------------
  • Gather all the ingredients in the software section above except the oil.
  • Add warm/lukewarm water gradually and make a dough out of it. Knead the dough thorougly for about 3-5 minutes. Cover and set aside for 30 min.
  • Divide the dough into lime sized balls, on a floured surface, roll out the dough into a paratha - about 6 - 8 inches in diameter.
  • Heat a skillet/tava on medium-high heat. Fry the paratha using about 1/2 tsp oil (just apply the oil to the two sides of the paratha) until it is golden brown on both sides.
Serving Suggestion: Serve warm with yoghurt and pickle.

Tuesday, March 21, 2006

Cabbage and Carrot Pappu

What does a girl do when she has carrot and cabbage leftover from her cabbage-carrot zhunka recipe? She makes a dal using the leftovers. I couldn't believe how simple it was to make the cabbage-carrot pappu. I should say that Shammi's post on cabbage-potato kootu inspired me a little. I had already "cooked toor dal" in the refrigerator. So putting this together was a snap.

I cooked the toor dal with a pinch each of hing/asafatida, turmeric powder/pasupu podi, black pepper powder, and salt. Here goes the recipe.

Software
---------------
  • 2 cups toordal, cooked
  • 2 cup shredded cabbage (packed)
  • 1 small onion, chopped roughly
  • 3 Indian green chilis/1 jalapeno
  • 1 lime sized tamarind, soaked and pulp squeezed
  • 1 tsp turmeric powder
  • 1 tsp sambhar/rasam powder
  • 1 tsp mustard seeds/aavalu/rai
  • 1 tsp cumin seeds/jeelakarra/jeera seeds
  • 1 sprig curry leaves/karivepaaku/kadi patha, chopped
  • 1 dried red chili, broken into pieces
  • 1 pinch asafatida powder/inguva/hing
  • 2 tsp extra virgin olive oil/or your favorite oil
  • salt, to taste
  • coriander leaves, to garnish

Hardware
---------------
  • Pressure cooker to to cook the toor dal
  • Saucepan
  • small fry pan/kadai for the tempering
Method
---------------
  • Put the saucepan on medium-high heat, add 1 tsp of oil. Add the onions, chilis fry until they are translucent.
  • Add the cabbage and cook for about 5-7 min or until cooked. Add the turmeric powder
  • Add the cooked toor dal and stir until dal is heated through and is mixed in with the cabbage. Add the tamarind paste/pulp.
  • Add salt and the sambhar/rasam powder and stir. Take the dal off the heat.
Tempering/Tada/Popu
-------------------------
  • Heat the 1 tsp oil in very small fry pan.
  • Add the broken red chili pieces, jeera and mustard seeds. After they pop, add the asafatida powder.
  • Add the chopped curry leaves and turn off heat.
Add the tempering to the prepared dal above. Add chopped coriander leaves at the end.

Serving Suggestion: Serve hot with rice,puri,chapathi or paratha.

Monday, March 20, 2006

Penne with creamy veggie sauce


I got home today my mind made up to eat some pasta. I love pasta in all shapes, sizes and forms. I looked around in the kitchen and started gathering up all the ingredients that remotely looked like they could go in with the pasta. I then remembered that the ingredients I had on hand closely matched to the ones in a Rachael Ray pasta creation I watched 3-4 weeks ago. Armed with the penne in the cupboard, fresh veggies and cheese in the refrigerator, Rachael Ray's recipe pulled up on the computer I made a replica. I did make modifications to this recipe - added different veggies, added in some cottage cheese, changed the pasta to penne (since that is what I had on hand) etc.

Since a good amount of veggies went into making this dish, I though this could make a worthy entry into Sweetnicks ARF/5-a-day Tuesday.

Software
---------------
  • 1/2 pound or 8 oz penne rigate/campanelle/cavatappi pasta
  • 1 small red onion, thinly sliced
  • 2 garlic cloves, minced
  • 1 cup sliced protobello mushrooms
  • 1 cup fresh spinach, finely chopped
  • 1/2 yellow pepper, thinly sliced
  • 1/4 cup roasted red pepper, thinly sliced
  • 2 tbsp dried basil or about 1/2 cup of fresh basil
  • 1 tbsp Italian seasoning
  • 1 tsp freshly grated nutmeg
  • 1 tsp or more, red pepper flakes
  • 1 tbsp all-purpose flour
  • 3/4 cup vegetable stock
  • 1/2 cup milk
  • 1/4 cup of part-skim ricotta cheese
  • 1/4 cup low fat cottage cheese
  • 2 tbsp extra virgin olive oil, EVOO
  • 1 tbsp butter
  • salt and pepper, to taste
Hardware
---------------
  • Saucepan - to make the pasta
  • Stockpot to boil the pasta
Method
---------------
  • Bring a large pot of water to boil, toss in the pasta, add a little salt and cook according to the package directions. Reserve about 1/2 cup of the pasta water.
  • Put a large skillet/saucepan on medium heat, add the 1 tbsp EVOO to coat the pan.
  • Add the onions and garlic and saute for a minute on medium-high heat.
  • Add the mushrooms and yellow pepper. Cook for about 5 minutes.
  • Add the chopped spinach and heat through until it is wilted through. Add the roasted red pepper. Add salt and pepper, stir. Transfer the veggies onto a plate.
  • Put the same saucepan on the stove, add the remaining 1 tbsp of oil and butter. Add the flour and stir for a couple of minutes to make a roux that will help thicken our white sauce.
  • Add the vegetable stock and the milk. Bring it to a boil. Add the italian seasoning, the dried basil leaves, red pepper flakes, nutmeg. The white sauce will now start to thicken. Add the ricotta and cottage cheeses, stir so the cheese melts. Add the reserved pasta water. Add the veggies back in so they heat through.
  • Mix the pasta with the sauce.
Serving Suggestion: Serve with grated parmesan cheese on top.

Tips: This makes about 2-3 servings. This recipe can be easily doubled.

Friday, March 17, 2006

St. Patrick's day - Mini Tropical Oreo Cheesecakes with Kiwi Jam topping


Happy St.Patrick's Day everybody!

This is my entry to Anthony's Curry Mela this week.

I got the idea for the mini cheesecakes from a friend who brought them to a superbowl party. She had made mini plain cheesecakes with vanilla wafer crust and cherry pie filling as the topping.

For St. Patrick's day, I wanted to make something green and these cheese cakes came to my mind. These have an "oreo" crust and crushed oreos in the filling. I topped them up with the kiwi jam I made over the weekend. I also added some coconut to make them more tropical.

Software
---------------
  • 3 packages of cream cheese, softened
  • 3 eggs
  • 1 cup sugar
  • 2 tsp vanilla
  • 1 cup shredded baking coconut
  • 1 package oreo cookies (will need about 25-30)
Hardware
---------------
  • one sheet pan/cookie sheet/muffin pan
  • Foil(not paper) cupcake liners
Method
---------------
  • Place the foil liners on a cookie sheet or put them in a muffin pan. I put mine on a cookie sheet as I could fit more on there than just 12 in a batch.
  • Put the side of the cookie that the icing in the foil cupcake liners with cream side up.
  • Put the other halfs in a big ziplock bag.
  • Close the ziplock bag containing the oreo halves and crush the cookies using a rolling pin on a canned vegetable tin. You could use the food processor for this but the zip lock bag method is more fun.
  • Cream together the softenend cream cheese with vanilla. Add the sugar and cream some more until the sugar blends. Add the eggs one at a time and cream until well blended. Add the crushed oreo cookies and the coconut, mix together.
  • Spoon the creamcheese mixture on to the foil liners, until it is about 2/3 full.
  • Bake in a 350 degree pre-heated oven for about 20-22 minutes.
  • Let the cheese cakes cool completely. Refrigerate for about an hour.
  • Take them out of the refrigerator and spoon the kiwi jam on top of the cool cakes. Cover and refrigerate for about another hour or overnight.
Makes about 25-30 cheesecakes

Tips: Canned cherry/blueberry pie filling or any other jam, jelly or marmalade can be spooned on top of these cheesecakes.

Wednesday, March 15, 2006

Bottle Gourd - Sorakaya/Anapakaya Dappalam

Bottle gourd (Sorakaya/Anapakaya (Telugu), Louki/dudhi (Hindi)) is one of my favorite Indian vegetables. I am always disappointed if this veggie doesn't show up in the Indian store here. Growing up, this was a staple in my home. We had a bottle gourd plant in our kitchen garden. This plant was so easy to grow and it would produce a LOT of gourds each year. We had a very hard time disposing off the gourds :). Usually family, friends and neighbours received these from us. One of my mom's friend used to take a couple of these often from our house and made us a very special "dudhi halwa". It was the most amazing dudhi halwa I had ever tasted to date.

This vegetable is cooked when it is young and tender. When cut open, a young gourd does not have prominent seeds. If this vegetable is too mature, the seeds inside are bigger. When we were kids, we used to patiently collect all the seeds, screw them on to a screwer, sprinkle some salt, pepper roast them over an open fire and eat them. They were truly yummy, or so I thought. I haven't tried doing this in the recent "rememberable" past to remember the taste :).

I make about 5 different kinds of dishes with this vegetable and love all kinds of preperations. My grandmother even made a curry with the outer skin of this vegetable and it was just yummy. I haven't been so lucky here in the U.S to find this veggie, free of any marks on the outer skin so I could use that skin to make the fry curry.

The following is a recipe for one of my favorite sorakaya recipes - sorakaya dappalam.

Dappalam is a cross between sambhar, rasam and pulusu in my opinion. Some dappalam recipes have toor dal in the recipe but my mine doesn't. It just has besan/gram flour/chick-pea flour instead.

Software
---------------
  • 1 medium size sorakya, peeled and cut into 1 inch slices
  • 1 medium onion, cut lengthwise
  • 4-5 Indian green chilis, cut lengthwise
  • 1 sprig curry leaves, chopped
  • 1 inch piece of ginger, chopped
  • 3 cloves of garlic, chopped (optional)
  • 1 lime size tamarind soaked in water and juice extracted
  • 1/2 tsp turmeric/haldi/pasupu powder
  • 1 heaping tbsp rasam powder
  • 1 heaping tbsp sambhar powder
  • 1 tbsp coriander powder
  • 1 pinch hing/asafatida powder
  • 3 tbsp of besan/chickpea flour/shanaga pindi
  • salt, to taste
  • chili powder, to taste
  • 1 tsp jeera/jeelakarra/cumin seeds
  • 1 tsp rai/aavalu/black mustard seeds
  • 1 tbsp extra virgin olive oil(EVOO) or your favorite oil
  • chopped coriander, handful
Hardware
---------------
  • 1 pressure cooker
Method
---------------
  • Put the pressure cooker on medium heat, add the oil. Add the mustard and jeera seeds until they splutter.
  • Add the green chilis, onions and curry leaves. Add the chopped ginger and garlic and the hing or asafatida powder
  • Cook until onions are translucent, add the sorakaya/bottle gourd pieces.
  • Cook for additional 2-3 minutes or so. Add the turmeric powder.
  • Fill the pressure cooker with water, just so all the sorakaya pieces are immersed in the water.
  • Cook until 2 whistles.
  • While the pressure subsides, take the besan flour in a small dish, pour water little by little to make a smooth, lump free paste out of it.
  • After the pressure dies down, open the cooker, add the tamarind juice. Mix well and add more water if needed. This should be of rasam consistency.
  • Add the sambhar powder, rasam powder, coriander/dhaniya powder, chili powder (if needed), salt.
  • Finally add the besan flour that was mixed with water above and stir.
  • Cook until the dappalam boils and is foamy on top. The dappalam thickens because of the addition of the besan flour.
  • Turn off the heat, add the cilantro leaves.
Serving Suggestion: Serve hot with rice.

Tips: The same recipe can be made with okra (pressure cooking is not needed, as okra cooks well on the stove top).

Tuesday, March 14, 2006

Cabbage and Carrot Zhunka - from One Hot Stove

This recipe is an adaptation of Nupur's Zhunka recipe that she had blogged about earlier in the month in her wonderful A-Z of Marathi Food series. I am always looking for creative ways to cook cabbage - the one vegetable that doesn't rank in my "must-eat" veggies and hence doesn't usually make it to my shopping list either.

I did do some changes to the recipe, so I am not exactly sure how authentic it is but it was yummy! One major change I made was to reduce the flour content, dry roast the flour and also added some additional masalas and carrots.

Software
---------------
  • 3 cups shredded cabbage
  • 1 cup matchstick carrots/shredded carrots
  • 1 medium onion, chopped lenghwise
  • 2 cups besan/chickpea flour
  • 2 tsp coriander powder
  • 2 tsp chili powder/to taste
  • 2 tsp (cloves + caradamom + cinnamon stick + black pepper) powder (dry roasted and powdered)
  • 1 tbsp extra virgin olive oil or your favorite oil
  • 2 tsp black mustard/rai/aavalu seeds
  • 2 tsp jeera/cumin seeds
  • 1 tsp turmeric powder/haldi/pasupu
  • 1 sprig curry leaves, chopped fine
  • 1 inch piece of ginger, peeled and chopped fine
  • 2-3 cloves of garlic, chopped fine
  • 1/3 cup of water
  • salt, to taste
  • handful of chopped cilantro
Hardware
---------------

one non-stick pan

Method
---------------
  • Put the pan on medium heat, and add the chickpea flour. Dry roast the flour until the raw smell goes away. Transfer it to a plate and keep aside.
  • Add the oil to the same pan, add the mustard and the jeera seeds. After they splutter, add the onions, ginger and garlic.
  • After the onions are traslucent, add the curry leaves, turmeric powder, chili powder, coriander powder, (cloves,caradamom,cinnamon,blackpepper) powder and stir.
  • Add the cabbage and stir. Cover and cook for about 5 minutes. Add the matchstick/shredded carrots. Stir. Cover and cook for another 2 mins.
  • Now add the roasted flour in batches stirring the cabbage, carrot mixture so the flour gets incorporated.
  • Nupur's recipe said that there is no need to add water but I had to with mine. The jiuces from the veggies weren't enough for the flour to get incorporated. I added about 1/3 cup of water. I also added a lot less flour than her recipe asked for also.
The end result was just superb! Thanks, Nupur for the recipe. Serve it with roti, puri or rice. I ate it with some crackers the next day and it was good with them too.

Monday, March 13, 2006

Kiwi Jam - Thatz whatz cookin' - ARF/5-a-day Tuesday

This is my entry to Sweetnick's ARF/5-a-day Tuesday this week!

Whenever I think of jam, my mind wanders to the hot summer afternoons in India. That is when mom made all of her jams, jellies, fruit squashes (not as in vegetable but I am using it in the verb form not as a noun) pickles, vadiyalu, appadalu, mamidikaya orugulu (spiced and dried raw mango)! Everything that had to be preserved for all year round was made in the summer. As with everything else, this was a huge family event everybody doing their own share.

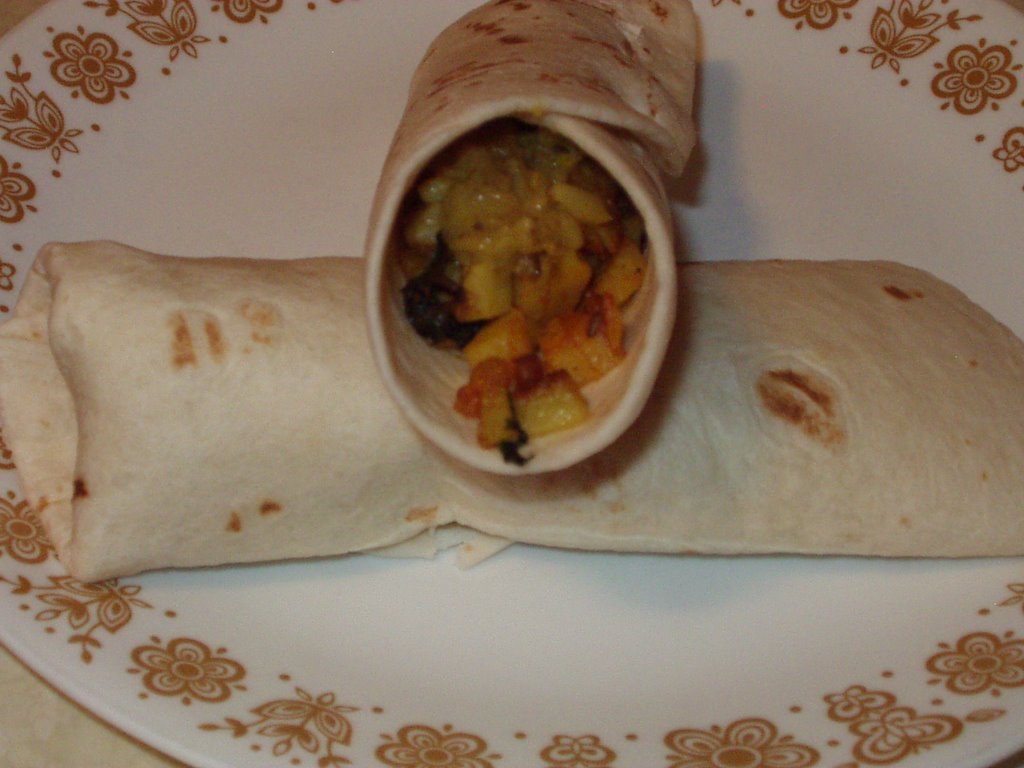
Coming back to jams, mom made all kinds - from veggies like tomato, carrot to fruits like apple, papaya, mango, mixed fruit (fruit medley!), grape, orange. We never bought the Kissan Jam available at the stores. My favorite way to eat jam was to spread it on some chapathi, roll it up and eat it. Bread and jam came second.

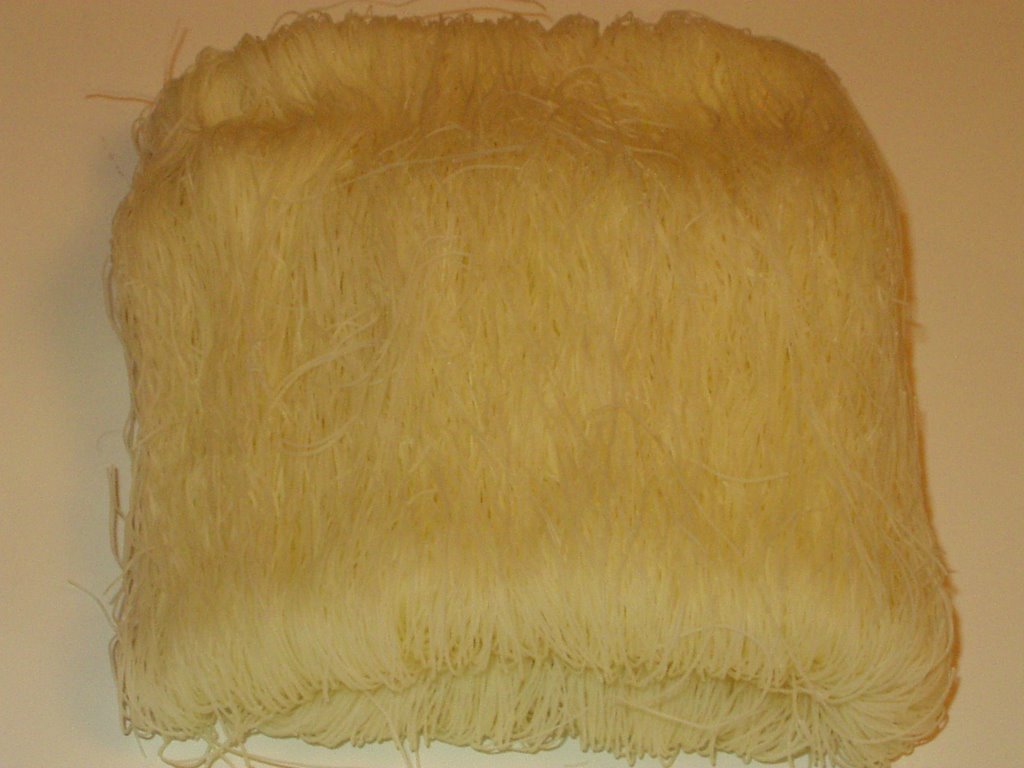
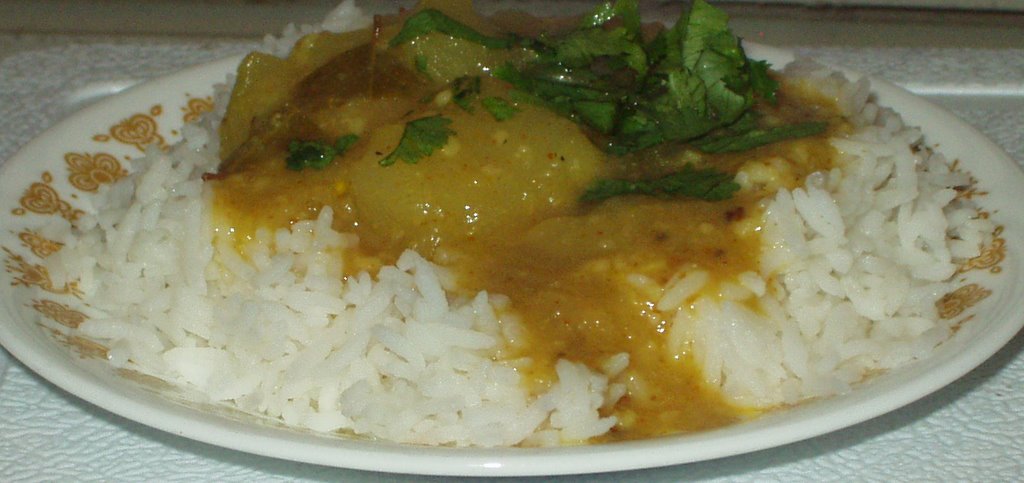
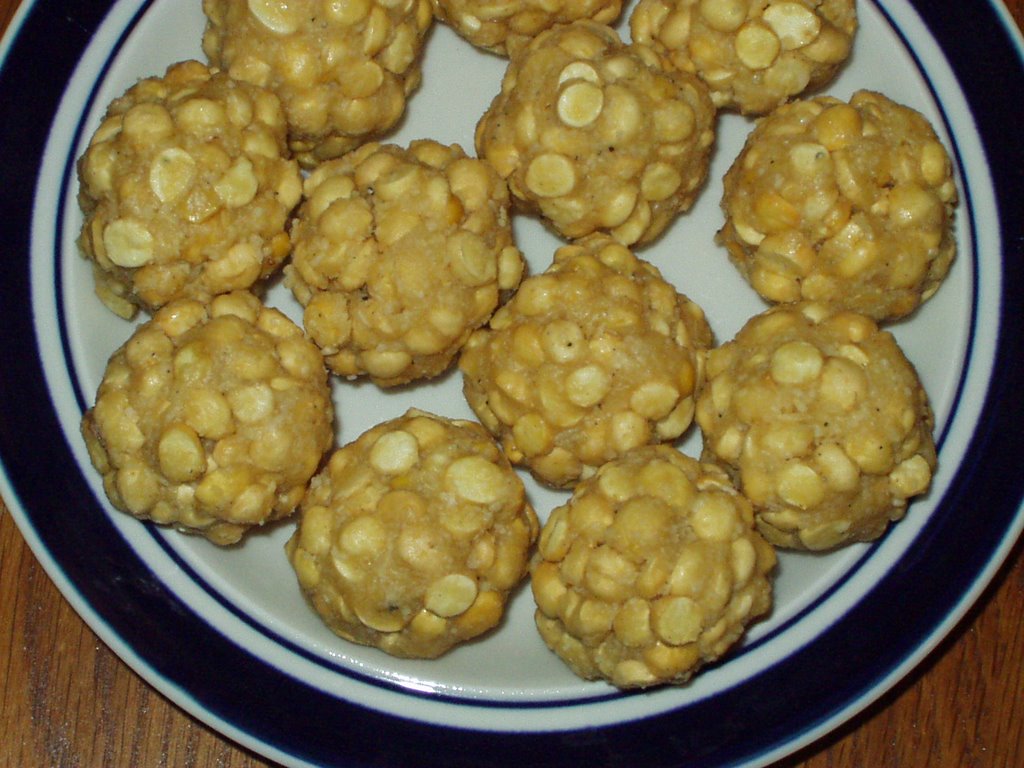
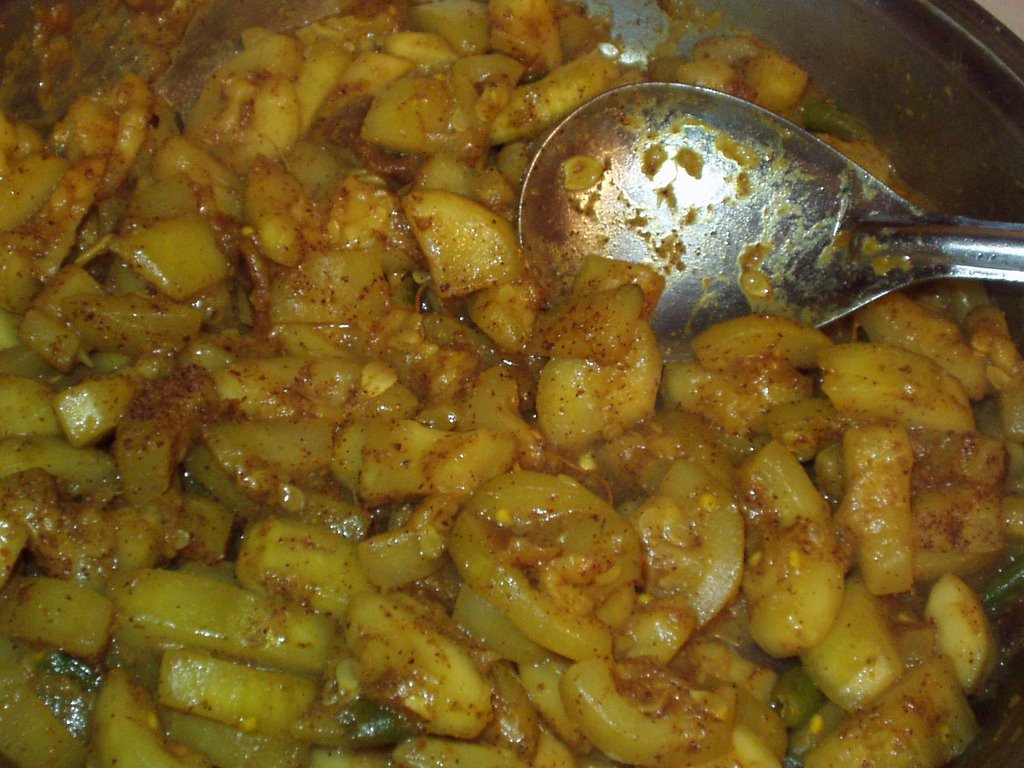
Now, coming back to this post. I had posted a picture yesterday asking fellow bloggers to guess what the dish was. I got very good responses. The first person to guess what the main ingredient was Manisha from Indian Food Rocks and Puspha from Pusiva's Culinary Studio. The first person to guess the exact dish was 
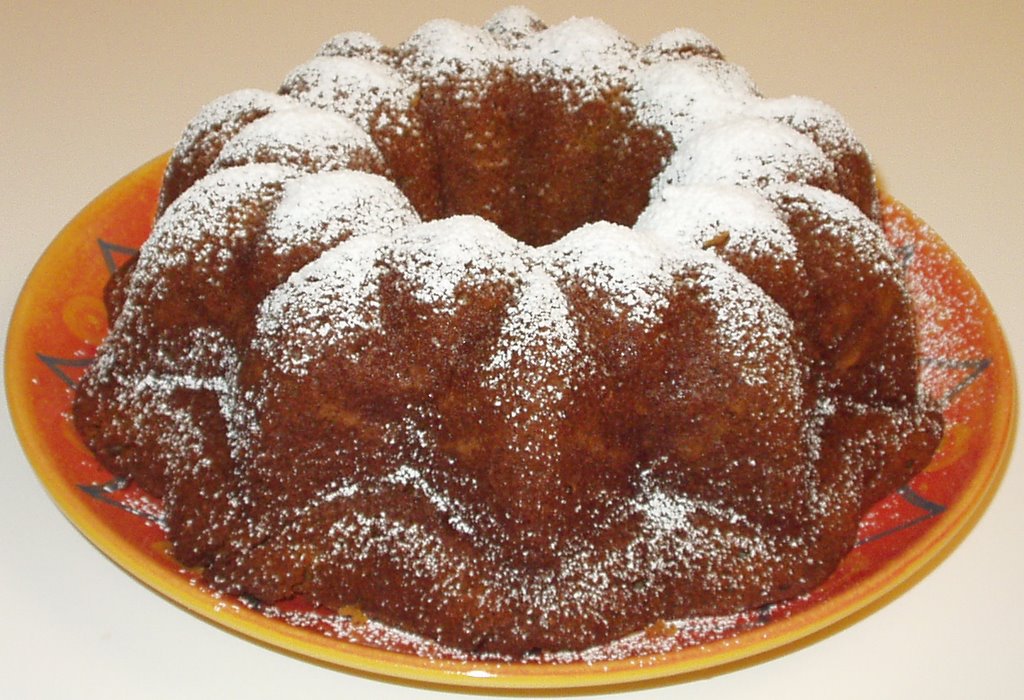
Spice Hut. If all goes well, I am going to be using the jam as a topping for some mini cheesecakes.

Thank you to everyone for playing along.

The recipe (makes 4 1/2 pints or 4 cups)

Software
---------------
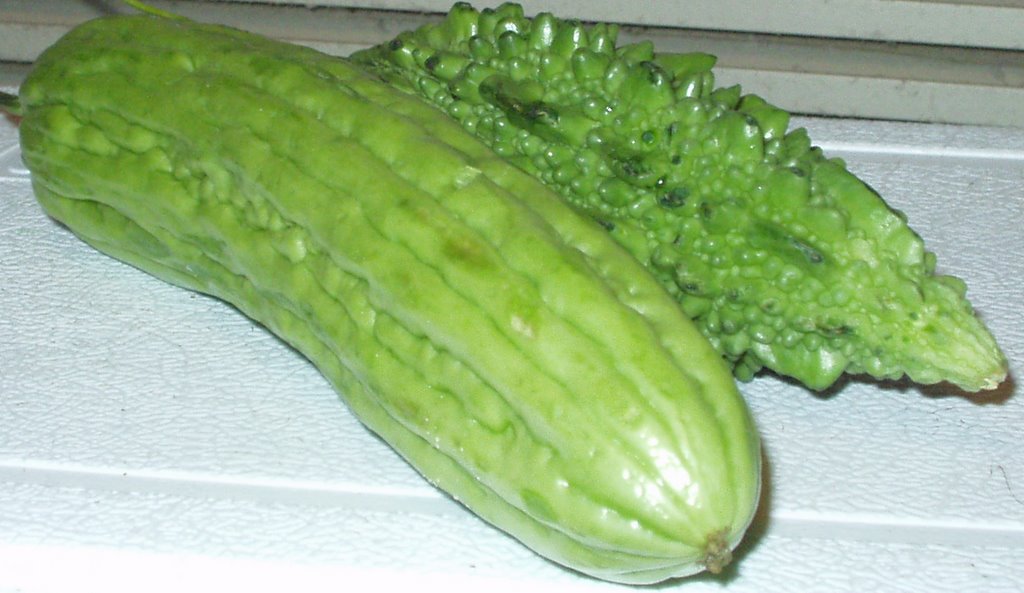
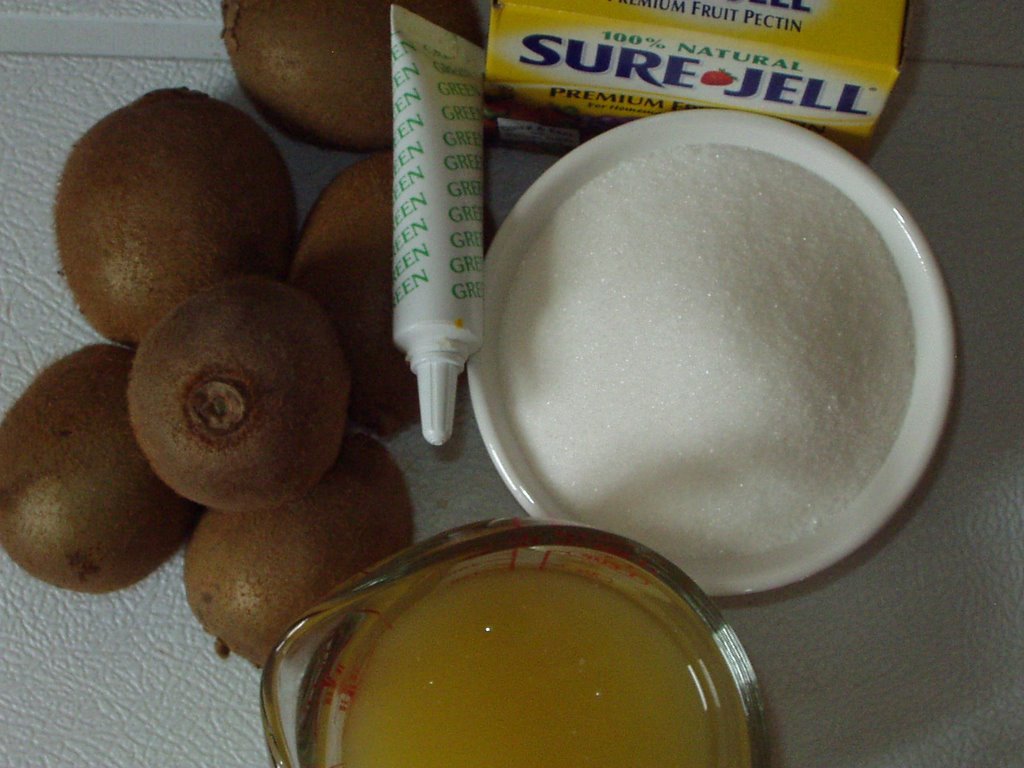
  • 10-12/3 cups chopped medium sized kiwi fruit
  • 3-4 cups sugar
  • 1 package fruit pectin
  • 3/4 cup pineapple juice
  • 1/4 cup lemon juice
  • 1 drop of green food color (optional)
Hardware
---------------
  • One big saucepan
  • 4 1/2 pint glass jars
Method
---------------
  • Peel, wash and cut the kiwi fruit. I cut the kiwi fruit into cirlces and then quartered the big circles and left the small circles (towards the end) alone. Those who like everything mashed may want to mash it up or chop the fruit into much smaller size than what I did. You should have about 3 cups of kiwis.
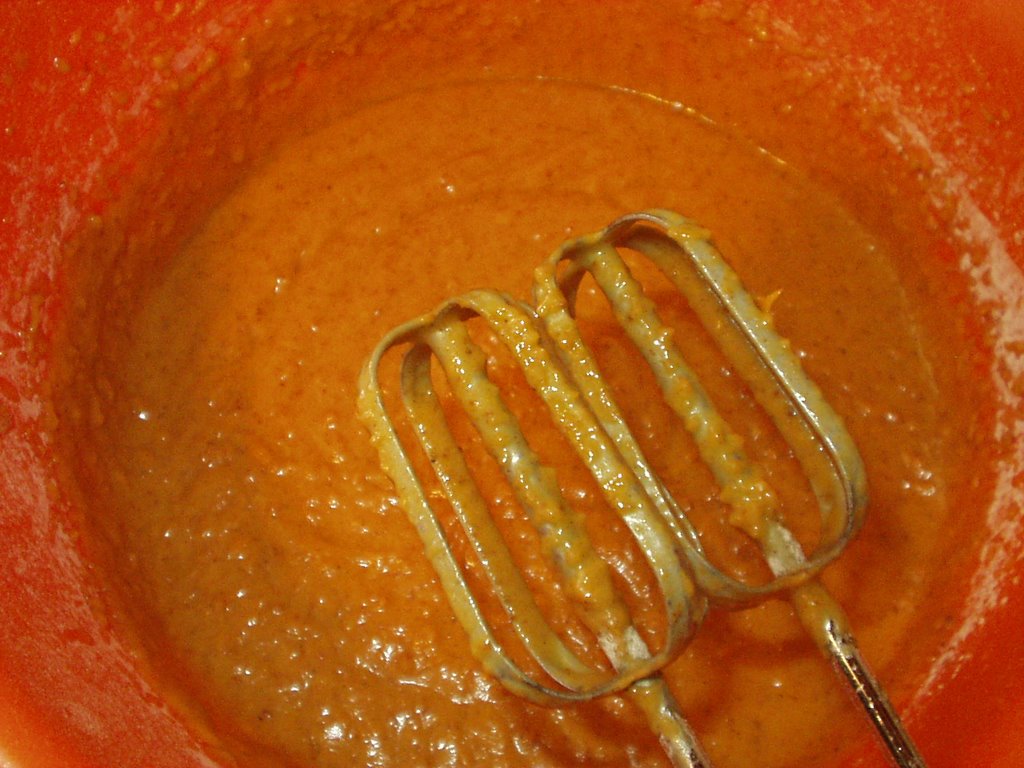
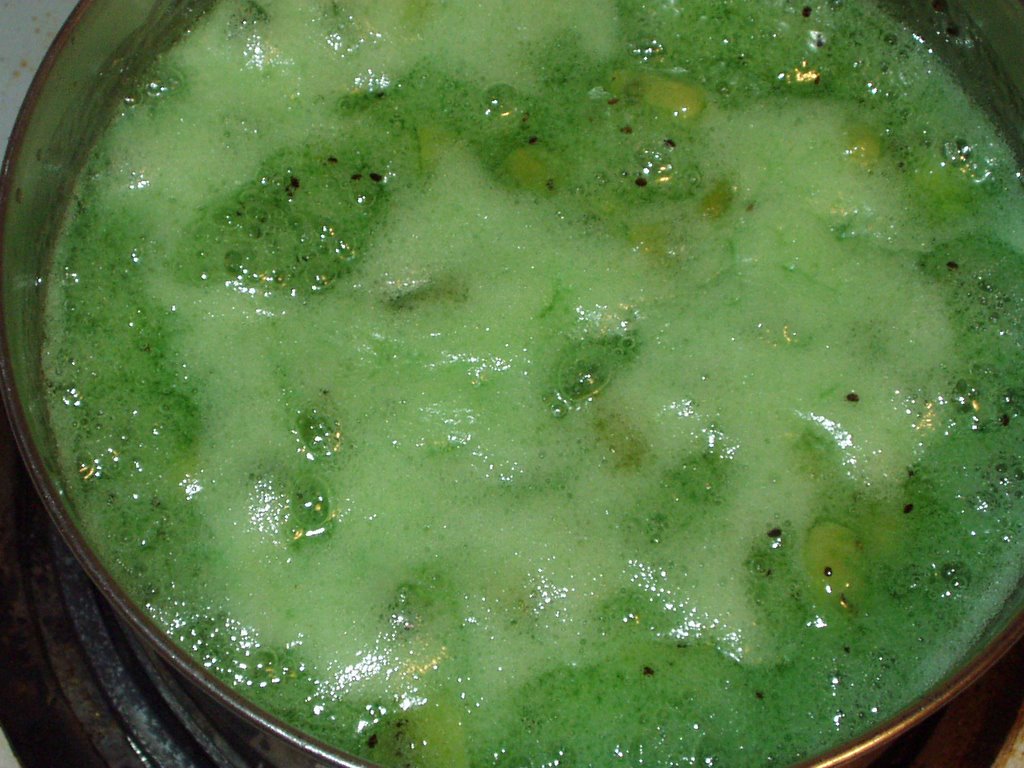
  • Put a sauce pan on medium-high heat and add the kiwis, pineapple juice and the fruit pectin. Stir ocassionally and let the mixture come to a rolling boil.
  • Add the sugar stirring the kiwi while adding. I used about 3 1/2 cups of sugar. You may wish to use a little less than that or the full 4 cups.
  • Bring the mixture back to a rolling boil (will take about 4-5 minutes). At this point, the mixture should be thickening up.
  • After the rolling boil, boil away for another 1-2 minutes then take the saucepan off the stove. Add the food color if desired. I added a drop to make it a little more green.
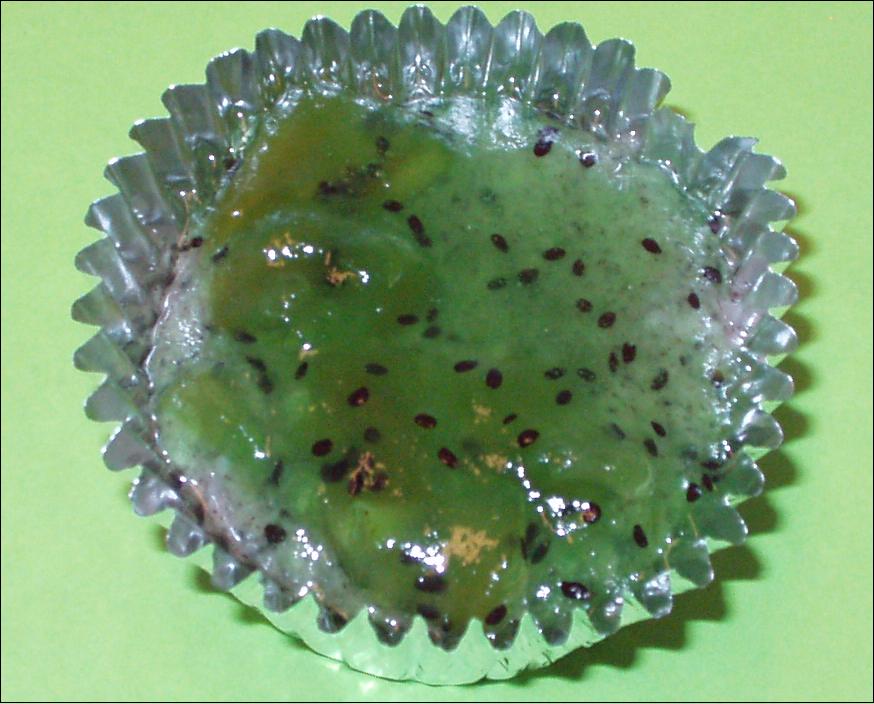
  • Skim off any foam on the top. The jam at this point is still a little liquidy. It is not of a jam consistency yet. It will set later as it cools down.
  • Pour into hot sterlized jam jars and seal. I am not the best person to talk about jams sealing techniques etc., as I have never done it before. The following are a couple of resources for the enthusiastic.
Ohio State University Extension's Page
Kraft foods has a video on Water Bath method for sealing the jars

All I did was, gathered some glass jars I had lying around and did it the way my mom does back home - washed them with hot soapy water and throughly dried them with a clean kitchen towel (my mom used to put them out in the sun). When the jam was ready, I put the glass jars in the microwave until they were a little hot to touch, ladled the jam into the jars. Be careful, both the jam and the glass jars are hot. Take precaution.

I am not planning on keeping this jam for long. I will use most of it for my dish for the cheesecakes. Hence, I did not explore long term storage. If you do follow my method, don't forget to refrigerate the jam even though mom never did and her jam never went bad :) but that is up to you.

Sunday, March 12, 2006

Guess Whats Cookin' for St. Patrick's Day

This is just a quick post and a guessing game :). All you have to do is guess what the green stuff bubbling away is.

This is something I made this afternoon to get ready for St.Patrick's day this Friday. I did not make the entire dish but just a topping. I think those are enough clues. Okay.. I will give another clue - think green!

Put your thinking caps on and guess away!

Saturday, March 11, 2006

Mango-Bananas Foster without the alcohol - late night snack/dessert

I watch way too much food network and have seen Rachael Ray and Emeril Lagasse (even Alton Brown) whip up Bananas foster. Everytime I saw them make it, I wanted to make it too. But I never did. This is a very easy, crowd pleasing dessert that comes together in a snap and is very easy to make. I cannot emphasize enough how easy it is. Anyone can do it.

The major issue I had with all the food network recipes is that there was always alcohol (rum and banana liqueur) in them. Emerill and Rachael always suggest setting some of the bananas aside for kids before adding the alcohol for the adults. I some how managed to assume that it wouldn't taste good without the alcohol.

But a couple of weeks ago, I did try the "kids version". I made bananas foster. All I can say is that it was amazing. I couldn't get enough of it. Tonight, I changed it up a little. I added sliced mango. Mangoes are my favorite fruit. It was even more heavenly with mangoes.

Software
---------------
  • 2 tbsp butter
  • 1/4 cup brown sugar
  • 1 under ripe banana
  • 1 mango
  • 1/2 tsp nutmeg
  • 1/2 tsp cinnamon
  • 1/4 tsp allspice (optional)
Hardware
---------------
  • One skillet
Method
---------------
  • Peel and slice the mango into think strips or cubes. Half the banana and slice it at an angle. Keep aside.
  • Put the pan on medium heat and add the butter. After the butter melts, add the brown sugar and stir until it integrates with the butter and melts. Add all the spices and mix.
  • Add the sliced banana and the mango. Let them brown a little on both sides.
Serving Suggestion: Put one scoop of icecream in a serving bowl, add the banana-mango mixture and then add the other scoop of icecream. Add more banana-mango mixture around it. Garnish with some mint.

I used the Breyers Double Churned Vanilla Icecream (98% fat free) just so I don't feel guilty mentally of eating too much of this dessert!

Makes about 2-3 servings.

Veggie Pakoras


Pakoras would be on my list of favorite appetizers if I am asked to choose. I like them way better than any kind bajjis any day. The difference between pakoras and bajjis is that, in bajjis veggies are dipped in a spiced besan flour batter so it is covered with the besan flour batter where as in pakoras, veggies and/or onions are directly added to the flour and then deep fried. The pakoras are far more crunchier than bajjis and my version uses the flour only to bind the veggies together, so there is not a lot of flour going on either. I just love that crunch.

Software
---------------
  • 1 cup gram flour/besan/shanaga pindi
  • 1/4 cup rice flour
  • 1/2 tsp ajwain/vaamu seeds
  • 1/2 medium onion, chopped fine lengthwise, then halved
  • 1 cup spinach leaves cut into very thin strips
  • 1 sprig curry leaves, chopped fine
  • 5-10 mint leaves, chopped fine
  • 1/2 tsp garam masala
  • 1 tsp chat masala (optional)
  • 1 tsp chili powder
  • 1 tbsp ginger and garlic paste (optional)
  • salt, to taste
  • vegetable oil, to fry
Hardware
---------------
  • one mixing bowl
  • one fry pan to deep fry
Method
---------------
  • Mix all the ingredients in the sofware list except for the vegetable oil together. Slowly add little water about less 1/4 cup and mix the batter. The batter should be very thick. It should not be runny at all. The consistency of the batter should be such that a ball can be formed together (almost like the chapati dough) but should be sticky, so a little more water than what you would add for the chapathi flour.
  • Heat the oil in the fy pan. After it is heated, about 300-350 degrees, take little bits of the batter and drop in the oil. Deep fry until golden brown. Drain on paper towels.
Serving Suggestion: Serve with tomato ketchup, tamarind chutney or mint chutney. Pairs well with Indian tea.

Wednesday, March 08, 2006

Vankaya/Brinjal/Eggplant Koora/Curry


I had the purple Indian eggplants in the refrigerator. They were not perfect i.e. some brown spots on some of them but I wanted to use them up anyway. I made a simple curry with them as I didn't think they were worth any thing fancy.

Software
---------------

  • 8-9 purple eggplants
  • 3-4 small golden potatoes, peeled and chopped
  • 2-3 tomatoes chopped or a cup of canned tomatoes
  • 1/2 onion, chopped fine
  • 1" piece of ginger, chopped fine
  • 1 large dried red chili, broken into 1" pieces
  • 1 tbsp shanaga pappu/chana dal
  • 1 tbsp minapa pappu/urad dal
  • 1 tsp aavalu/rai/black mustard seeds
  • 1 tsp jeelakarra/jeera/cumin mustart seeds
  • 1/2 tsp pasupu/turmeric powder
  • 1 tsp dhaniya/coriander powder
  • 1 tsp red chili powder
  • a pinch of garam masala
  • 1 tsp salt or to taste
  • 1 tbsp extra virgin olive oil
  • 1 sprig curry leaves, chopped (optional)
  • cilantro and mint to garnish, chopped fine (optional)

Hardware
---------------
One pan

Method
---------------

  • Cube the potatoes and put in a little bit of water and microwave them until they are more than half cooked but not completely cooked. Keep aside.
  • Meanwhile, cube the eggplants, I usually take the stems off because they are dried out anyway. If you are lucky enough to have fresh looking stems I would trim them a little and keep them.
  • Put the pan on medium high heat and add the oil. Add the broken red chili peppers, the chana dal and the urad dal. Also add the jeera and rai seeds. After they splutter, add the onions and the curry leaves.
  • After the onions are translucent, add the chopped ginger and the turmeric.
  • Add the potatoes, eggplant, tomatoes, salt and chili powder. Cover and cook.
  • After the eggplant and potatoes are soft to touch, add the coriander powder, chopped mint leaves (optional) and the cilantro (optional)
Serve warm with rice, roti, parathas, couscous.

Tip: Between the cilantro and the mint, I add about a big handful. I love my herbs, so I add them. If you are not a huge fan, omit them.

Putnala/Dalia/Roasted Chickpeas Laddu


I made these dalia laddus a couple of weeks ago when I wanted something sweet and had little time on hand. I had originally not intended on including coconut in the recipe but I only had 11/2 cups of dalia and when I added them to my the jaggery syrup it looked a little runny and I frantically started looking in the cabinets for something to thicken it up. I found coconut. I used the shredded coconut found in the baking aisle. You could substitute that either with dried chopped coconut (if you like the coconut crunch) or the coconut powder you get in the Indian stores. You can omit the coconut completely and just use about 2 cups of dalia.

Software
---------------
  • 2 cups dalia/putnalu
  • 1 cup jaggery/bellam/gur
  • 2 caradamom pods, de-seeded and powdered
  • 4-5 tbsp coconut powder/shredded coconut used for baking
  • approx. 1/3 cup water

Hardware
---------------
One saucepan

Method
---------------

  • Put the saucepan on low heat, add the jaggery add just enough water to cover the jaggery, don't add any more water than necessary.
  • Stir well and the jaggery should start to dissolve. Increase the heat to medium-high.After the syrup starts to bubble up, reduce the heat to low. After about 5 min, test the consistency of the syrup by dropping a drop in a bowl filled with about 1/2 inch of water. If the syrup drop retains its shape and does not disintegrate, then the syrup is ready.
  • Turn off the heat, add the caradamom seed powder, coconut(if using) and the dalia. At this point, the mixture should not be runny at all, if it is add more dalia or coconut as needed.
  • After it cools down a bit, put ghee/clarified butter on your palm and make lime ball size balls/laddus.

This recipe will make about 15-18 laddus. These will keep outside in an airtight container for 3-4 days.

Tuesday, March 07, 2006

ARF/5-a-day Tuesday - Mexican Night it is

I learnt about Sweetnick's ARF/5-a-day Tuesday from fellow bloggers. I went to Sweetnick's blog and discovered what the top 20 ARF foods are. As soon as I saw blackbeans, I was so excited. I love blackbeans and will eat anything made with them. I despise the "canned black beans". Somehow, I feel they lack the flavor of "cooked from scratch" black beans. Usually on a weekend afternoon while I am watching a movie, I go on a "bean-cooking adventure". I put two pots on the stove and buy 1 lbs each of two diferent kinds of dried beans and cook them.

Then I cool the beans, use some of them right away if I am making something. I put the remaining in freezer baggies and freeze them in serving portions.

One of my favorite recipes with black-beans is my black-bean,veggie and cheese quesedilla.
Blackbean and veggie quesadillas Guacamole Mexican Rice

Black bean Quesadillas

Software
---------------

  • 2 cups pre-cooked black beans - beans that are not cooked to a mush
  • 1 medium white onion, chopped fine - set aside 2 tbsp for guacamole
  • 4 large cloves garlic - set aside a pinch for guacamole
  • 1 red bell pepper, diced fine
  • 1 green bell pepper, diced fine
  • 1 cup frozen corn
  • 1 jalapeno / 2 serrano peppers
  • 4-5 large flour tortillas(burrito size)
  • 1-2 cups Moterey Jack Cheese/some kind of Mexican cheese
  • 1/2 tsp salt
  • 1/2 tsp red chili powder (if you want this spicy)
  • 1 tsp ground cumin
  • 1 tsp ground coriander powder(optional)
  • 1 tbsp taco seasoning/some kind of mexican seasoning
  • Vegetable Oil/Pam to fry the quesedillas
  • 1 handful cilantro - chopped fine
  • 1/4 cup salsa (I used the Lizano salsa from Costa Rica that my boss had given me)

Hardware
---------------

  • One pan to cook the filling
  • A non-stick grill pan/skillet to fry the quesadillas


Method
---------------
  • Put the pan for filling on medium-high heat and add the 1 tbsp of EVOO. Add the the onions, jalapeno and garlic, cook until onions are translucent, add the tri-colored peppers and the frozen corn heat until they are soft and lightly browned.
  • Stir in the black beans and cook until they heat through.
  • Add the cumin, chili powder, taco seasoning and salt and stir until the flavors blend.
  • Add the salsa, remove from heat, cool for about 5 minutes and add the cilantro.
  • Place a non-stick skillet/grill pan over medium/medium-low heat. Spray pam/brush some vegetable oil on one side of a tortilla. (I don't use my usual EVOO here because of the low smoking point)
  • Place the tortilla on the skillet, oil side down, sprinkle some cheese on half of the tortilla, spoon some black-bean mixture, spread it around so it covers the half, add some more cheese on top of the beans mixture.
  • Fold the tortilla so the bean and cheese mixture is completely covered by the other half of the tortilla. At this point, if you are using a grill pan, quarter turn the tortilla so you get nice grill marks. If you are using a regular sillet, just wait until the side is golden brown.
  • Turn it over and let it brown/grill mark on the other side too. Ensure that the cheese is melted. Both sides should be brown and crispy.
  • Repeat with remaining tortillas.
  • Cut each tortilla into 3-4 wedges using a pizza cutter/knife.
  • Serve with salsa, guacamole and sourcream. Garnish with additional cilantro if desired.

Guacamole

I do have a yummy guacamole recipe that a co-worker gave me but tonight, I just wanted something simple and quick. I basically added almost the same ingredients I had on hand for the quesadillas.

Software
---------------

  • 1 avacado, pitted and mushed
  • 1/2 tsp lime juice
  • 2 tbsp onion, chopped
  • 2 tbsp sourcream
  • a pinch cumin
  • a pinch chili powder
  • a pinch salt
  • a pinch black pepper
  • a pinch nutmeg
  • a pimch of corainder seed powder(optional)
  • cilantro, as you please
Hardware
---------------
one small bowl

Method
---------------
  • Combine all the above together and put it in dish, cover with plastic wrap to prevent oxidation and browning of the avacado.

Mexican Rice

Software
---------------

  • 1 cup uncooked rice (any kind except minute)
  • 2 cups cold water
  • 2 cloves garlic, minced
  • 1/2 medium chopped onion
  • 1 jalapeno/serrano pepper, minced
  • 1 medium tomato, diced
  • 1/4 cup tomato sauce/tomato paste
  • 1 tsp cumin powder
  • 1 tsp chili powder
  • 1/2 tsp salt, or to taste
  • 1 tsp EVOO
Hardware
---------------
saucepan

Method
---------------
  • Put the oil or EVOO in the saucepan over medium heat, add the rice and keep stirring so it browns evenly. The browning of rice is very important and makes the rice very fluffy, so please don't skip this step. Towards the end of the browing, add the jalapeno, garlic and onion.
  • Add the water and add remaining ingredients. Reduce the heat to medium-low.
  • Cover and cook for about 20 mins
  • After 20 minutes have passed, check it in between so it doesn't brown. The rice should be done in about 20-30 min time.
Serving Suggestion: Serve 3-4 wedges of quesadillas, with some rice, guacamole and store bought salsa and sour cream.

Tips: If this recipe makes more quesadilla filling than you need, the filling can be refrigerated upto 2-3 days and used for buritto filling, taco filling, can be mixed with some cooked rice. The filling is also perfect layered with some tortilla chips and cheese for a veggie version of nachos.


Suggestions: This long post may make it seem that this is a very time consuming recipe, but it is really not. Since the ingredients (onion, garlic, cilantro etc) are in more than one of the dishes, you can chop them at once. You can start cooking the rice at the same time as the filling for the quesadillas. When the filling for quesadillas is cooling, the guacamole can be whipped up. By the time rice is done, you will be close to be done with assembling the quesadillas.

Monday, March 06, 2006

Oscar Night Dinner - Simple and Comforting - Potato/aloo/bangaladumpa fry wrapped in a Flour Tortilla


While the stars at the Oscars ate very expensive caviar and took home gold dusted chocolate Oscars, I enjoyed the night watching them with a very simple meal.

I got home late after a visit to a friends house and the Oscars had already started. I realized that I have NO dinner preperations done and was looking for something that I can prepare watching T.V (you see, unlike some lucky people, I don't have a T.V in the kitchen). I thought up of something that takes more time to prep and less time to cook. As usual, I moved my set-up to infront of my T.V to prep.

Software
---------------
  • 10-12 small golden potatoes
  • 2 tbsp chana dal/shanaga pappu
  • 2 tbsp urad dal/minapa pappu
  • 2 tsp cumin/jeera/jeelakarra seeds
  • 1 tsp black mustard/aavalu/rai seeds
  • 1 tbsp coriander powder
  • 1-2 tbsp chili powder
  • 1 tbsp extra virgin olive oil/any other oil you prefer
  • salt to taste
  • chopped cilantro/coriander leaves

Hardware
---------------
  • Non-stick fry pan

Method
---------------
  • This is the step that takes the most amount of time in this preperation. Peel and dice the potatoes into tiny pieces. See the picture, above for an idea of the size of the diced potatoes. Have patience, it will be rewarded :).
  • Take the non-stick pan, put it on medium-high heat. Add the chana dal, urad dal. After a minute or so, add the jeera and mustard seeds.
  • After the seeds splutter, add the diced potato pieces and stir once after a minute or so. Cover with a lid and reduce the heat to medium.
  • Go watch your Oscars or do whatever you please, come back and check on the potatoes and stir every 5 minutes.
  • After the potatoes look and feel tender, add the salt, the chili powder and the coriander powder and stir. Taste and adjust the ingredients.
  • Since I like my potateoes, extra crispy, I just let them fry a little more on the stove without the lid.
  • Garnish with the cilantro/coriander leaves.
At this point, this fry can be served with rice, roti, paratha. I put mine in a couple of flour tortillas with a couple of spoonfuls of my zucchini chutney!

Sunday, March 05, 2006

Poha/Atukula Chudwa - Perfect Sunday Afternoon Movie Snack


If you just would like the recipe and don't want to get bored with my story, click here!

It was early this afternoon, was getting ready to watch a movie and I wanted something salty and spicy. I ruled out all the options. The first food that came to my mind was popcorn. I thought I should just microwave some popcorn. But then, I wanted something MORE than POPCORN. I was longing for something Indian. I thought of bajjis or pakoras but they seemed too much work. Then "chudwa" came to mind.

My memories of eating chudwa are from when I was a child. For every wedding in the family(aunts and uncles), I remember my grandmother and few other ladies in the neighbourhood would start the food preparations about a week-ten days before the wedding ceremonies actually started. Among the elite "pelli vantakalu" (wedding foods) were Boondi Laddu, Badusha, Kajji Kayalu, Murukku, Boondi Kaara (Mixture) and Chudwa. I remember all the old ladies about 10-15 of them, talking, having fun, joking, making these all day long for 4-5 consecutive days. They used to set up the kitchen outside :) because it would get so hot inside with all the cooking. Mind you, these women would make any where from 1000-1200 boondi laddus.

Gone are the days where cooking during weddings was a family affair. There was always one grandfather of mine, one uncle of mine, one grandmother of mine who was good at making a particular dish. It was almost customary for certain people to make certain dishes at weddings. I remember the night before the wedding where every relative that came for the wedding would be assigned a chore - be it chopping vegetables, cooking, prepping etc.

Gone are those days (atleast in my family)! Now everything is catered and usually it is a cook and his/her assistants that make and deliver the food.

Now to the actual recipe!

Software
---------------
  • 4 cups thin poha/atukulu
  • 2 green chilis/1/2 jalapeno
  • 3 red chilis
  • 3 tbsp cashew (raw and broken)
  • 5 tbsp peanuts (raw)
  • 5 tbsp dalia/putnalu
  • 2 sprigs curry leaves (broken/chopped into pieces)
  • 1/2 tsp turmeric powder
  • 1 tsp salt
  • 4 tbsp of extra virgin olive oil/anyother oil you fancy

Hardware
---------------

  • One pan


Method
---------------

  • Put the pan on medium-high heat. Add the oil.
  • Add the peanuts to the oil and stir so they move around in the oil. After a minute or so, add the green chilis, red chilis and cashews (in that order) and move them around too until the nuts are golden brown.
  • Then add the curry leaves, the turmeric powder and stir.
  • After the curry leaves splutter, add the dalia or putnalu and stir again.
  • Now, reduce the heat to low and add the poha, a cup at a time, stirring so all the poha pieces are coated with the turmeric and the oil. Keep stirring and keep adding the poha.
  • After all the poha is added, keep on low for another 5-8 min stirring in between.
  • Taste to see if the salt is enough. If not, add more salt as you please.
  • Let it cool and serve.

This will keep in an air-tight container for about 10-15 days. Goes really well with chai/Indian tea. For a wonderful chai post, visit Saffron Hut's blog post here

Saturday, March 04, 2006

Zucchini/Courgette Squash Chutney/Salad Dressing

Zucchini Chutney

It has been only a couple of hours since I started this blog but I already learnt something new. During my research to type this entry, I learnt that Zucchini flower is also used in cooking. The Wikipedia entry went on to say that in Mexico, the flower is preferred over the fruit. I will watch out for the zucchini flower from now on. If anyone else tasted a dish made out of the zucchini flower, please let me know. I would love to know.

Now coming back to the intent of this post, I do not remember seeing this sqaush in India. If anyone else has seen it, I would love to be enlightened.

A couple of summers ago, a friend who had a kitchen garden, had too many zucchinis and gave me a few. At that point, I tried to find some Indian recipes to make with. I found the zucchini chutney, zucchini with tomato and onion curry recipes etc. I adapted these recipes to my own tastes. Now buying zucchini is a regular in my household. I usually toss them in pasta sauces, grill zucchinis etc.

The following is my version of the chutney.

Software
---------------
For the chutney


  • 3 medium to large zucchinis
  • 6-7 Indian greenchilies or 2-3 Jalapenos
  • small lime size ball of tamarind
  • 1/2 tsp methi/fenugreek/menthulu seeds
  • 1 tsp cumin/jeera/jeelakarra seeds
  • 1 tsp black mustard/Rai/Avvalu seeds
  • 1 tsp coriander/dhaniyalu/dhaniya seeds
  • 1 inch ginger (peeled) piece
  • 1/2 tsp turmeric/haldi/pasupu powder
  • salt, to taste
  • 1 tsp of extra virgin olive oil

For popu/tadka/tempering

  • 2 tsp chana dal (optional)
  • 2 tsp urad dal (optional)
  • 1 tsp extra virgin olive oil/any other oil you prefer
  • 1/2 tsp black mustard/Rai/Avvalu seeds
  • 1/2 tsp cumin/jeera/jeelakarra seeds
  • 1 sprig curry leaves/kadipatha/karivepaku

To garnish (optional)

3 sprigs cilantro/dhaniya/kothimeera

Hardware
---------------

  • One pan

Zucchini Chutney

Method
---------------

  • In a pan, add the cumin, mustard, fenugreek and coriander seeds and dry roast them until you smell the aroma. Cool the spices and grind it in a spice grinder.
  • Peel and dice zuchini into cubes. Since it will be put in the food processor anyway, I would just randomly chop it. Cut the green chilis in half. Cut the ginger coarsely.
  • In a pan, heat 1 tsp of the extra virgin olive oil (EVOO), add the zucchini pieces, green chilis and the tamarind. I just add the tamarind directly without soaking it in water and squeezing the pup out so that the chutney does not become watery. You can try soaking it in water and adding just the pup if you don't mind runny chutney.
  • After about 5 min of cooking, add the turmeric and salt.
  • Cook until the zucchini is soft and tender to touch.
  • Add the previously ground spice mixture, mix it well and let it cool.

Zucchini Chutney

  • While the zucchini is cooling, heat the 1 tsp oil for the popu in a small fry pan and add the dals first (if you are using them) and then add the rest of the ingredients.
  • Put the zucchini in the food processor and blend until smooth.
  • Add the popu to the ground zucchini and the chutney is ready to serve.

Serving Suggestion: This chutney goes well with rice, roti, paratha. I make a without popu version of this chutney and use it as a salad dressing - I stream in another 1/4 cup of EVOO while it is blending. I also use the without popu version as a sandwich spread.

A Sweet Start - Carrot Halwa


A very warm welcome to everyone. One of the reasons I started this blog is because I got inspired by all the other bloggers out there.

What better way to kick off my blogging experience than with something sweet to eat? Here I present, my version of the scrumptious Indian dessert called "Gajar Ka Halwa" or "Carrot Halwa". I remember my mom making this dessert for special occasions. She usually recruited me or one of my sisters or my dad to grate carrots for her. We usually did this while watching T.V. The ingredients required for this recipe are just a handful.

Software
---------------
  • 3-4 tbsp of ghee
  • 12-15 medium to large fresh carrots
  • 1 can sweetened condensed milk
  • 1 16 oz container of half and half/milk
  • 3-4 caradamom pods
  • 1/4 cup sugar
  • Handful of cashews broken in half and golden raisins

Hardware
---------------

  • One large heavy bottomed pot
  • One grater
Method
---------------
  • First peel, wash and grate the carrots. It will be easier if the tips of the carrots are not cut off as the tips can be used to hold the carrot so you don't end up grating your fingers :). This will take a while so take a seat or move your setup to the nearest T.V, like I did. You should have about 4-41/2 cups of packed grated carrot.
  • Meanwhile, place the heavy bottomed pot on the stove on medium heat, add 1 tbsp of ghee/clarified butter. Add the broken cashew pieces and fry for 30 sec or so and add the golden raisins. Fry until the cashews are golden brown and the rasins plump up. Make sure you move them around in the pot. Remove from the pot and keep aside.
  • To the same pot, on medium-high heat, add another 1 tbsp of ghee and put the grated carrots. Fry the carrot in ghee for about 10-15 mins until the raw smell of the carrot turns into a yummy fragrance.
  • Now add the 16 oz (2 cups) container of half and half. For a low fat version, you can substitute this with about 10 oz - 12 oz (about 1 1/2 cup of milk) and the sweetened condensed milk.
  • Now we come to the "stir and wait" part. Keep stirring the carrot, milk mixture so it doesn't stick to the pot. This is where your choice of the "heavy bottomed" pot helps you out a little. I use my alumium pressure cooker (without the lid) for such tasks.
  • Meanwhile, de-seed the caradamom pods, powder the seeds (I use my coffee turned spice grinder for this) and keep aside.
  • When the carrot, milk mixture begins to come together, starts to leave the sides of the pan, it is of halwa consistency (a little thicker than apple sauce), taste it. It should be pretty sweet because of the sweetened condensed milk that we added. If it is not sweet enough add sugar at this point and stir it for another 5 min. I have had to add about 1/4 cup.
  • Turn off the stove, add the caradomom seed powder and mix in the cashews and raisins. Add the remaining 1 tbsp of ghee.
  • Serve it warm.
    This makes about 10-12 medium servings